
With forms in Heyloyalty, you can create subscribe, unsubscribe and update forms, so contacts can manage their own information. You decide which fields the form contains, which information is required and how the form is displayed.
In this guide, we go through how to create a form, configure its settings and get an embed code or a link, so you can use the form on your website or in your emails.
Create a form from a list
Click Lists → ⁝ → Edit list → Forms, and then choose the type of form you want to create.
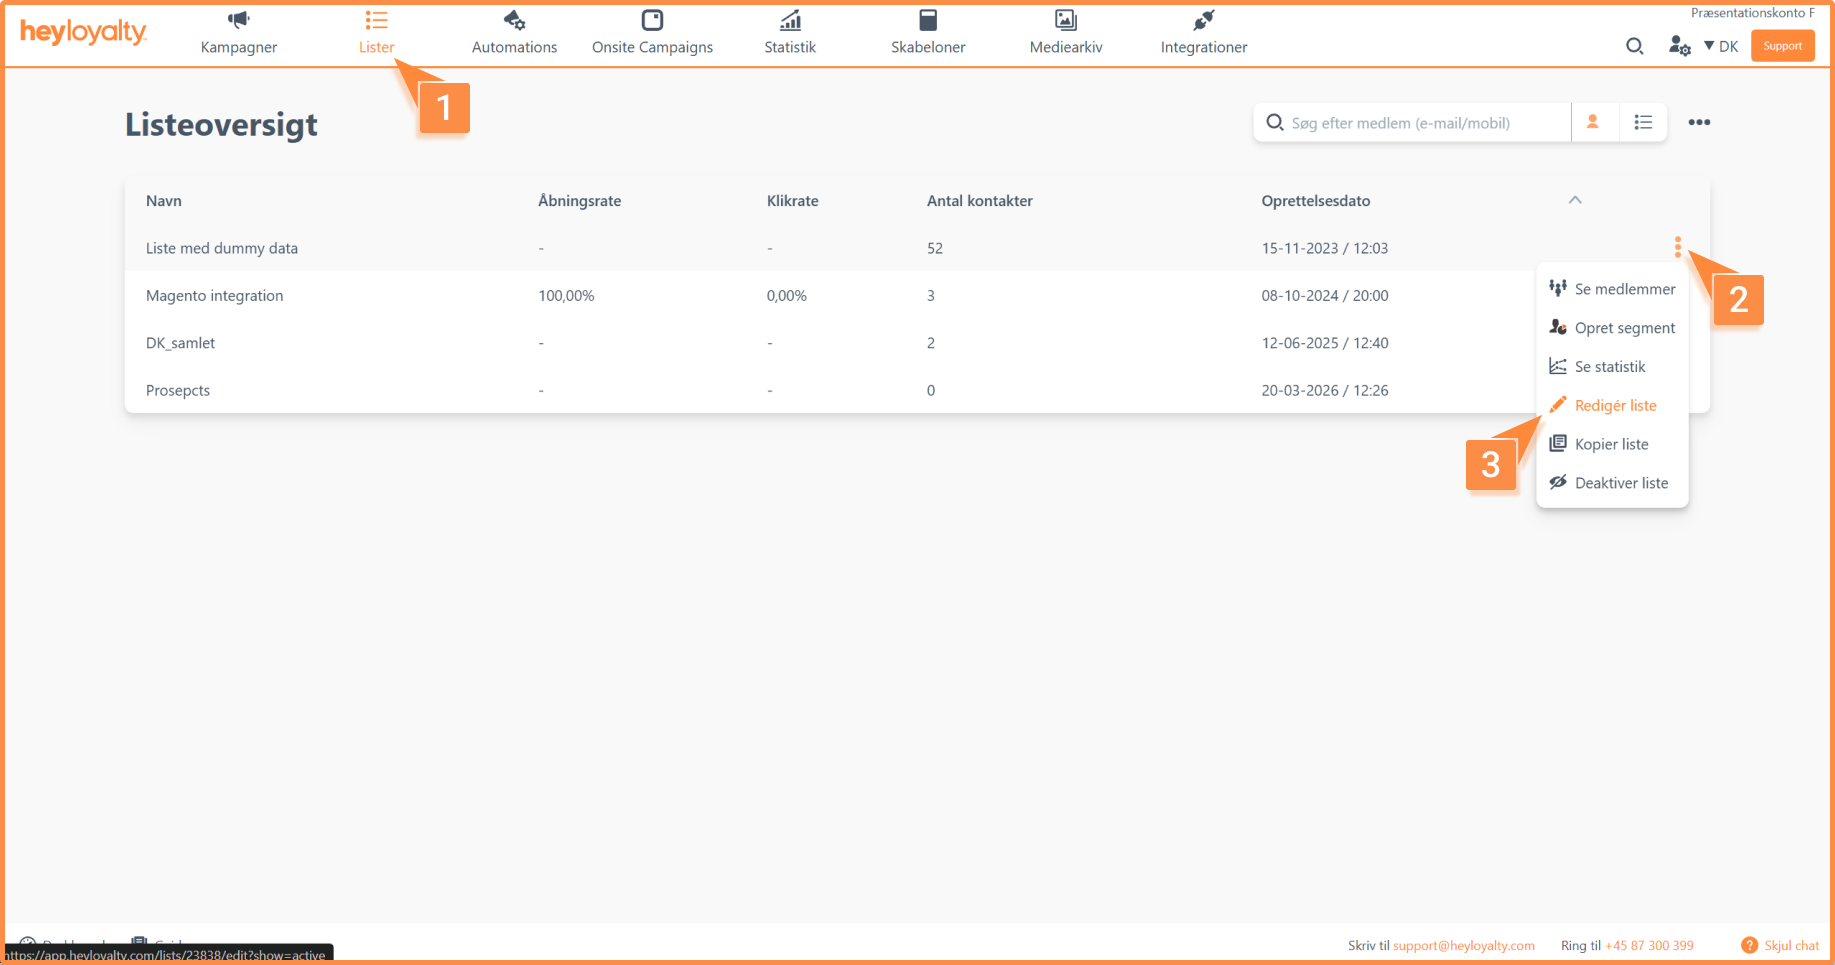
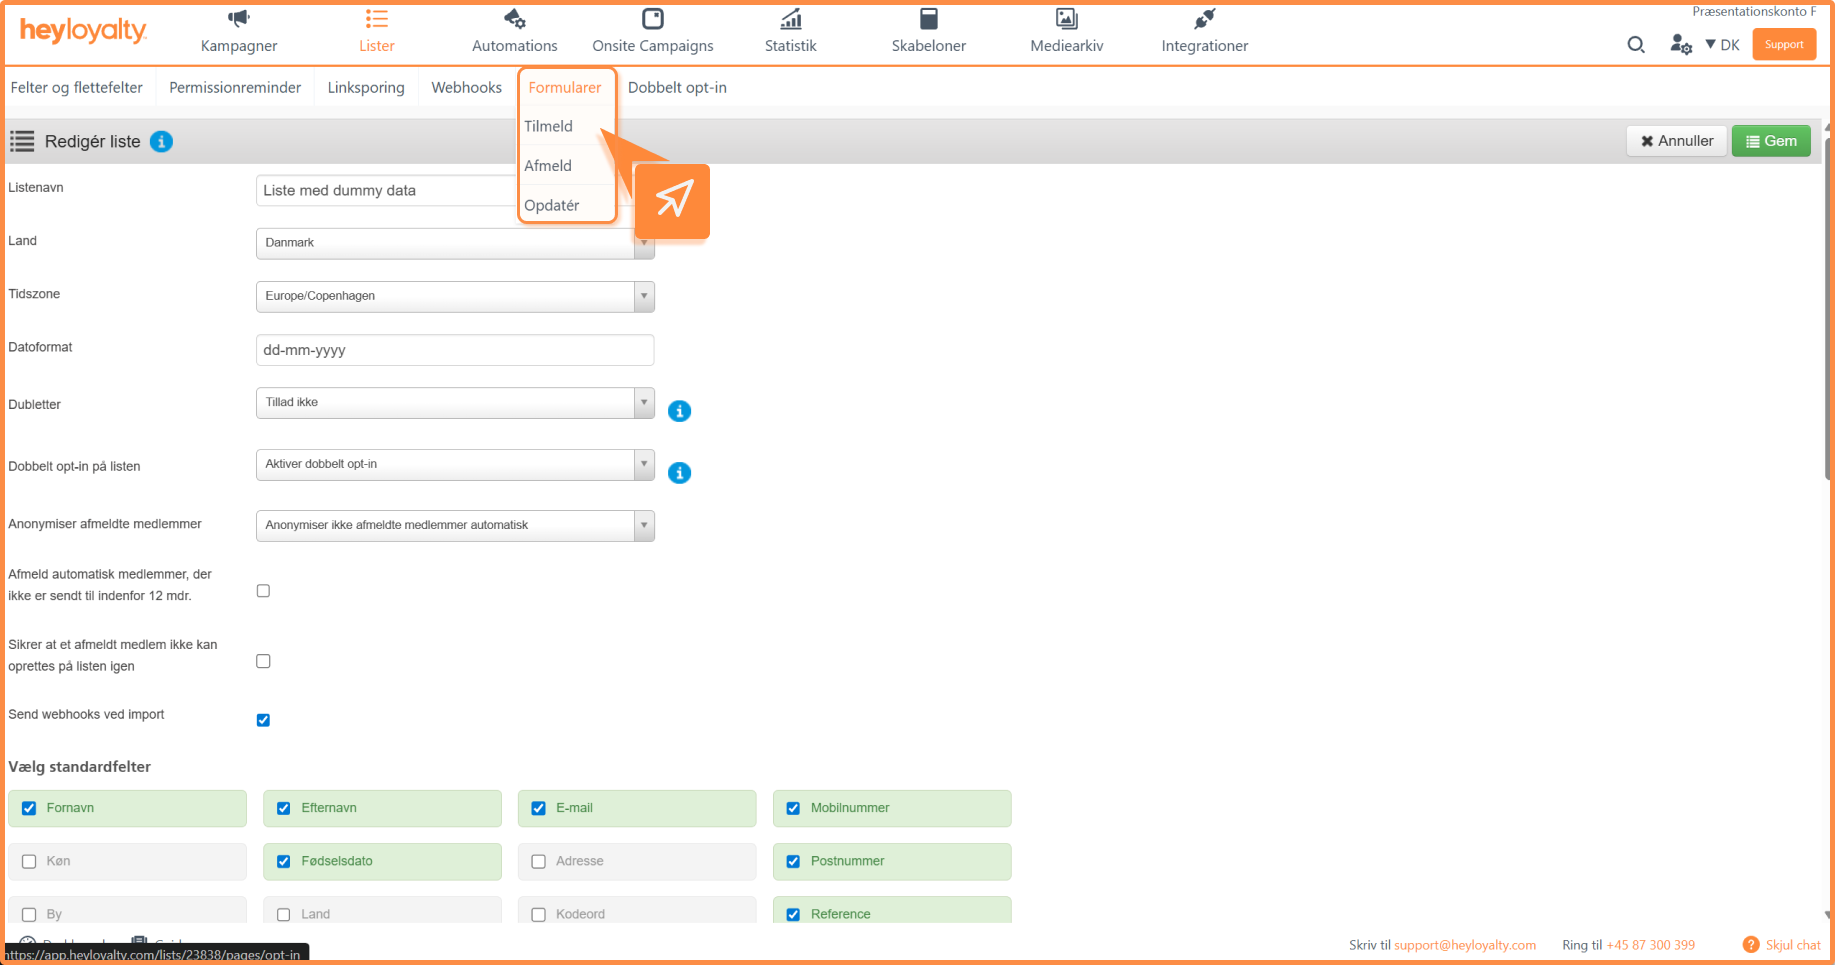
Not sure which form type to choose? Here is the difference between the three form types:
- Subscribe: Choose this form type if a contact should be subscribed to the list.
- Unsubscribe: Choose this form type if a contact should be unsubscribed from the list. The contact will then no longer appear on the active list.
- Update: Choose this form type if a contact is already on the list and existing or new data fields should be updated. Note that this form type is implemented on your website in a different way than Subscribe and Unsubscribe. Read more about the implementation here.
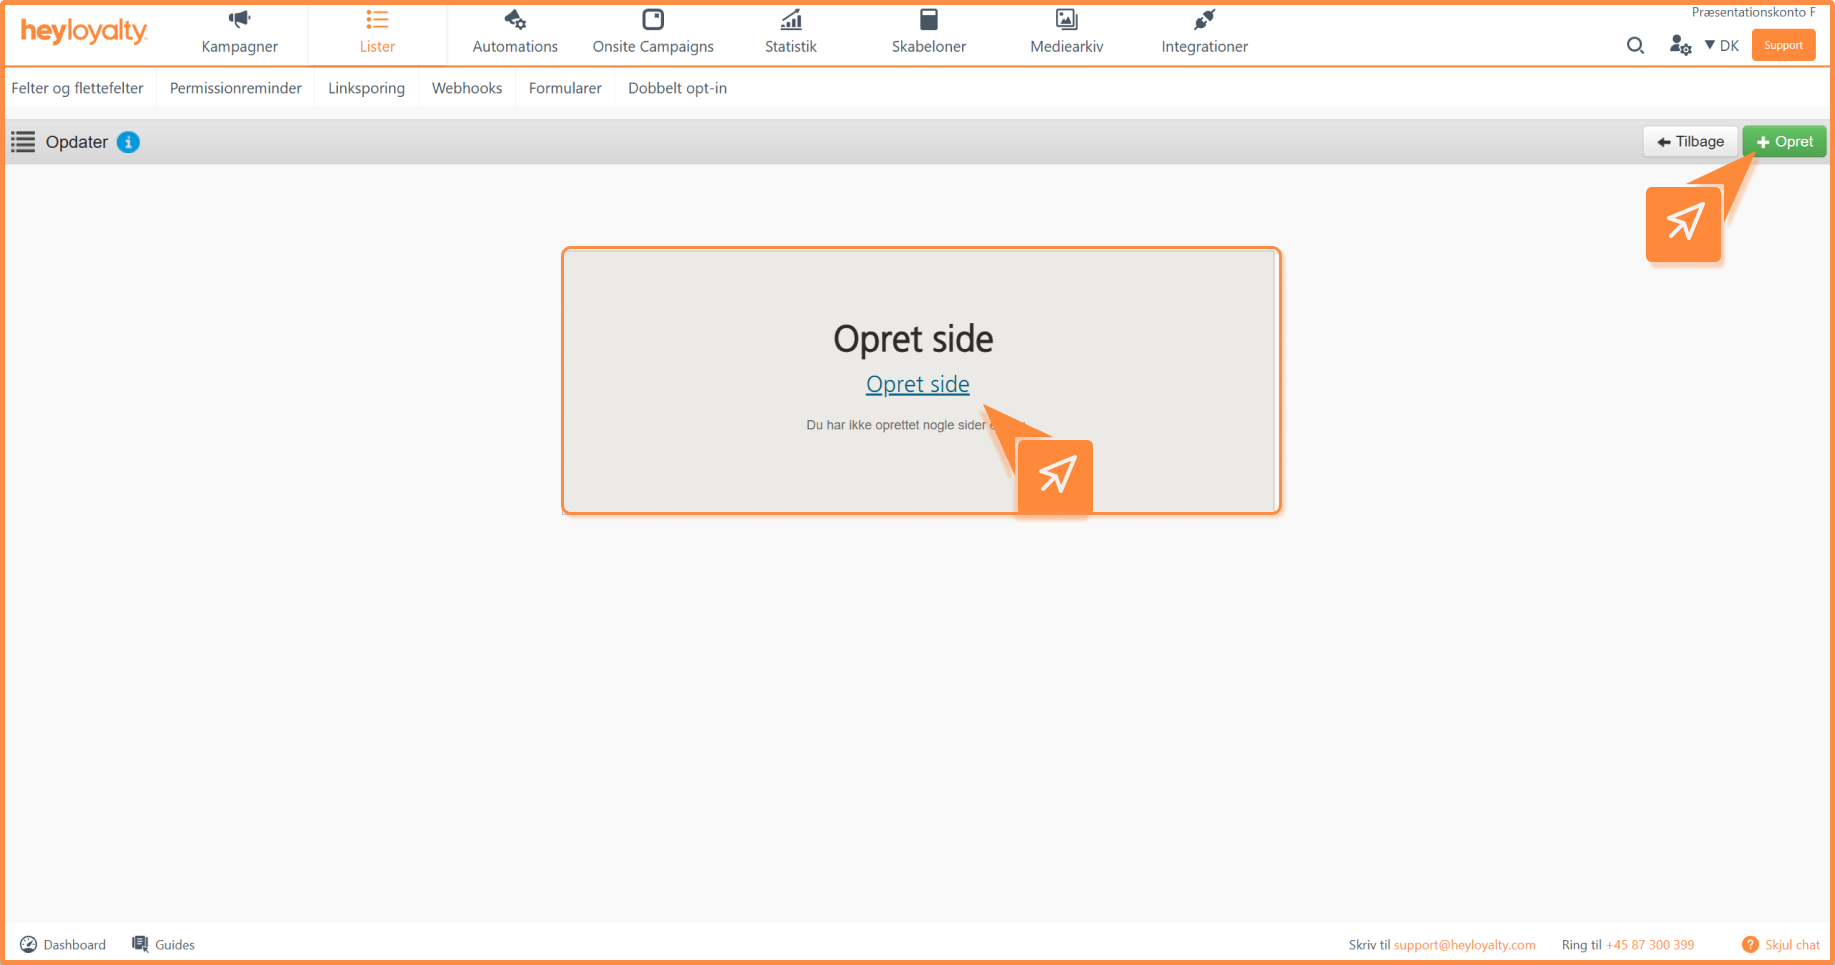
When you have chosen the form type, click Create page if there is not already a form of that type on the list.
Set up the form
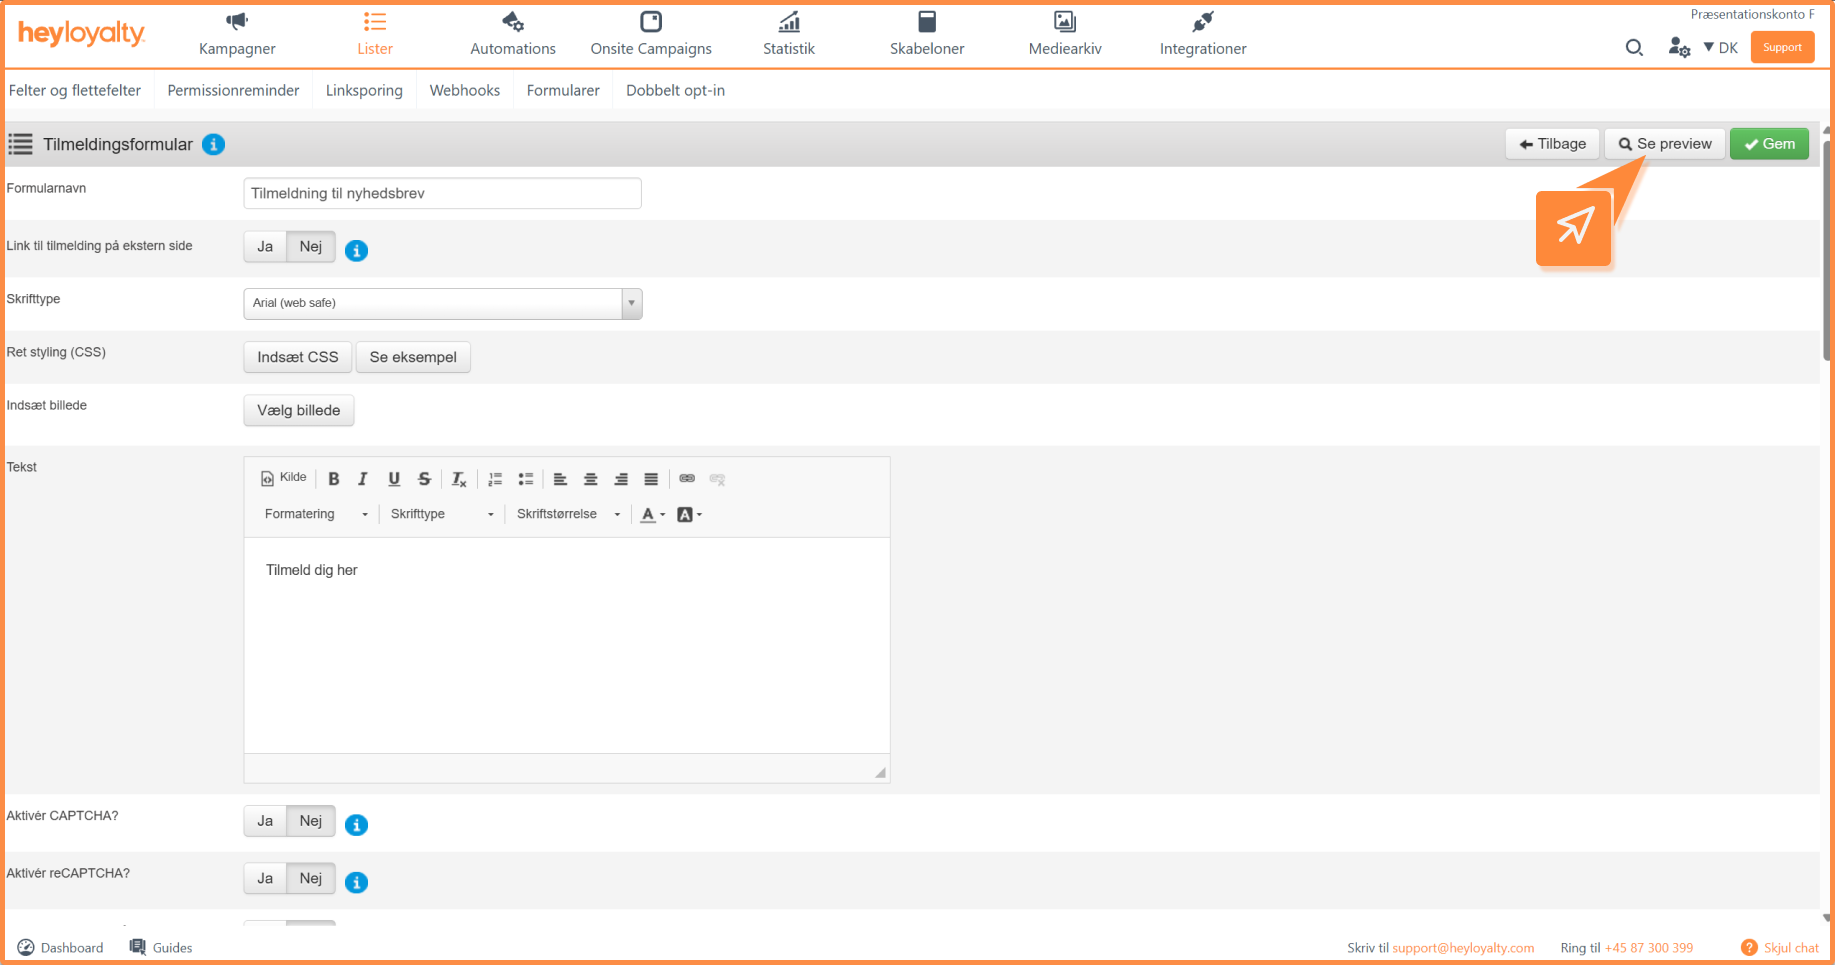
You have two options when you set up the form: Link to external form or use our setup, where you can customize the content of the form.
First, give your form a name in Form name.
Link to external form
Set this option to Yes if you have your own web page where the form can be found.
When you click Yes, a box appears where you can type or paste the URL that contacts should be sent to.
Use our setup
CSS controls the look of the form box, which you can adjust with Insert CSS. You do not need to know CSS to create a subscription form.
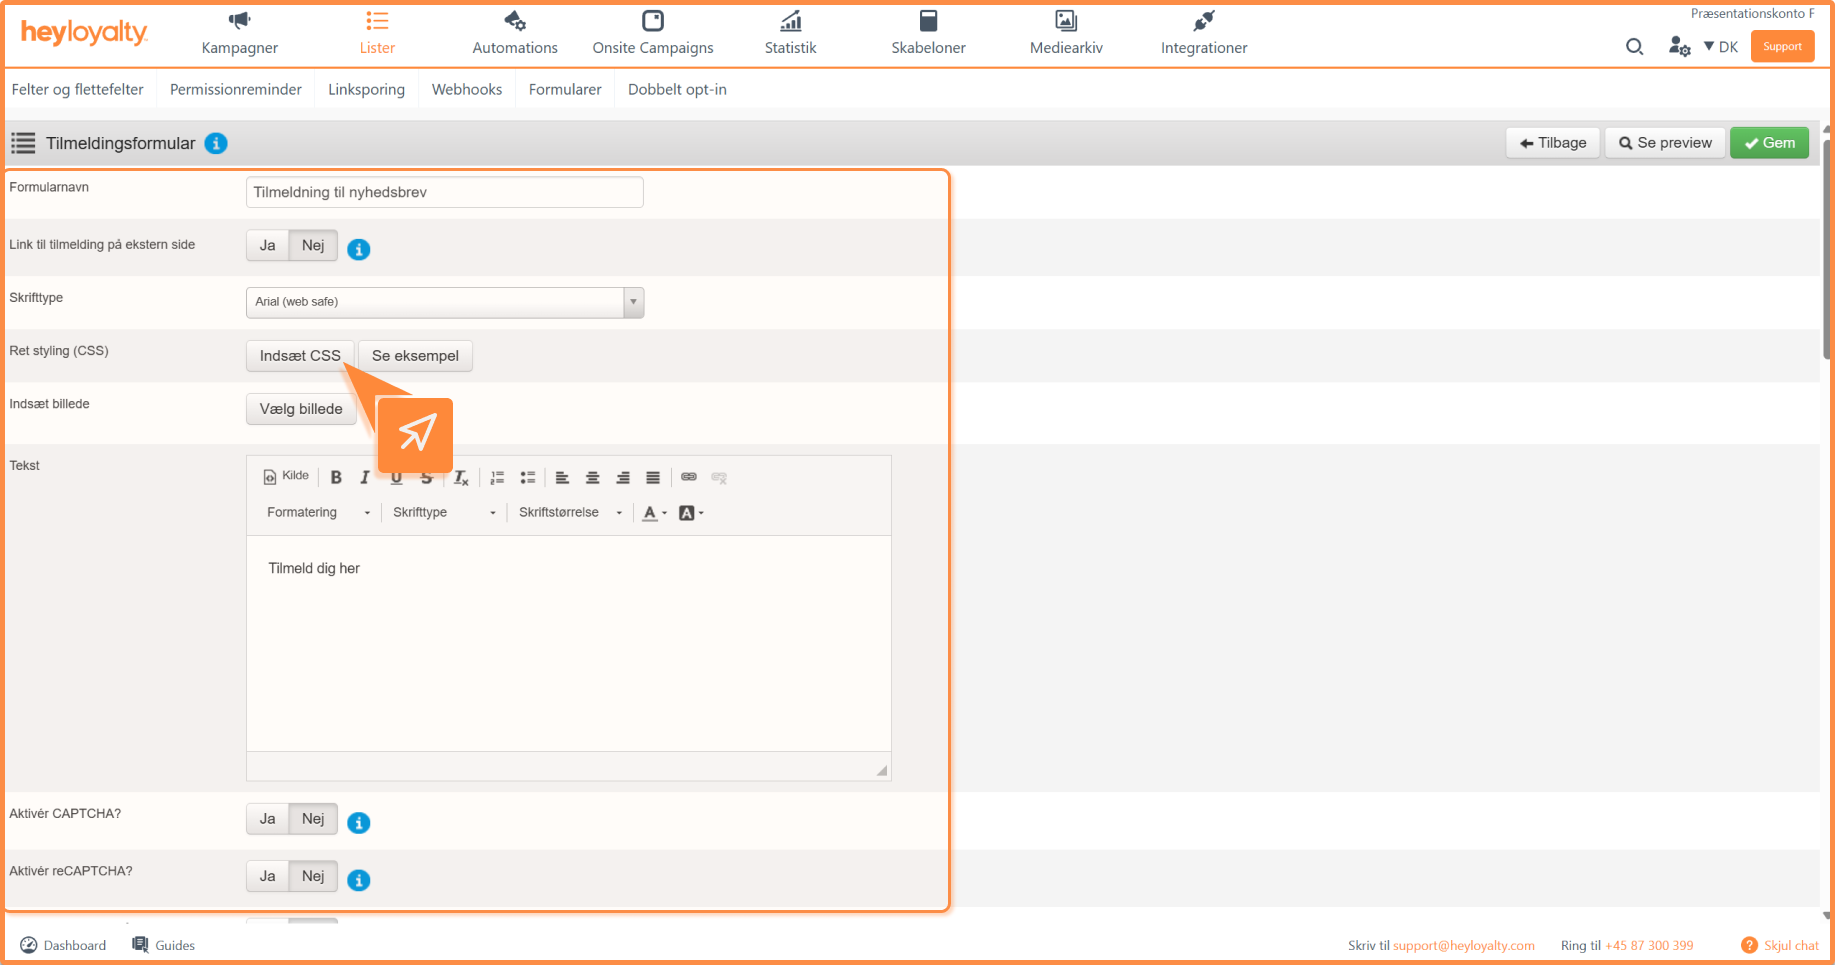
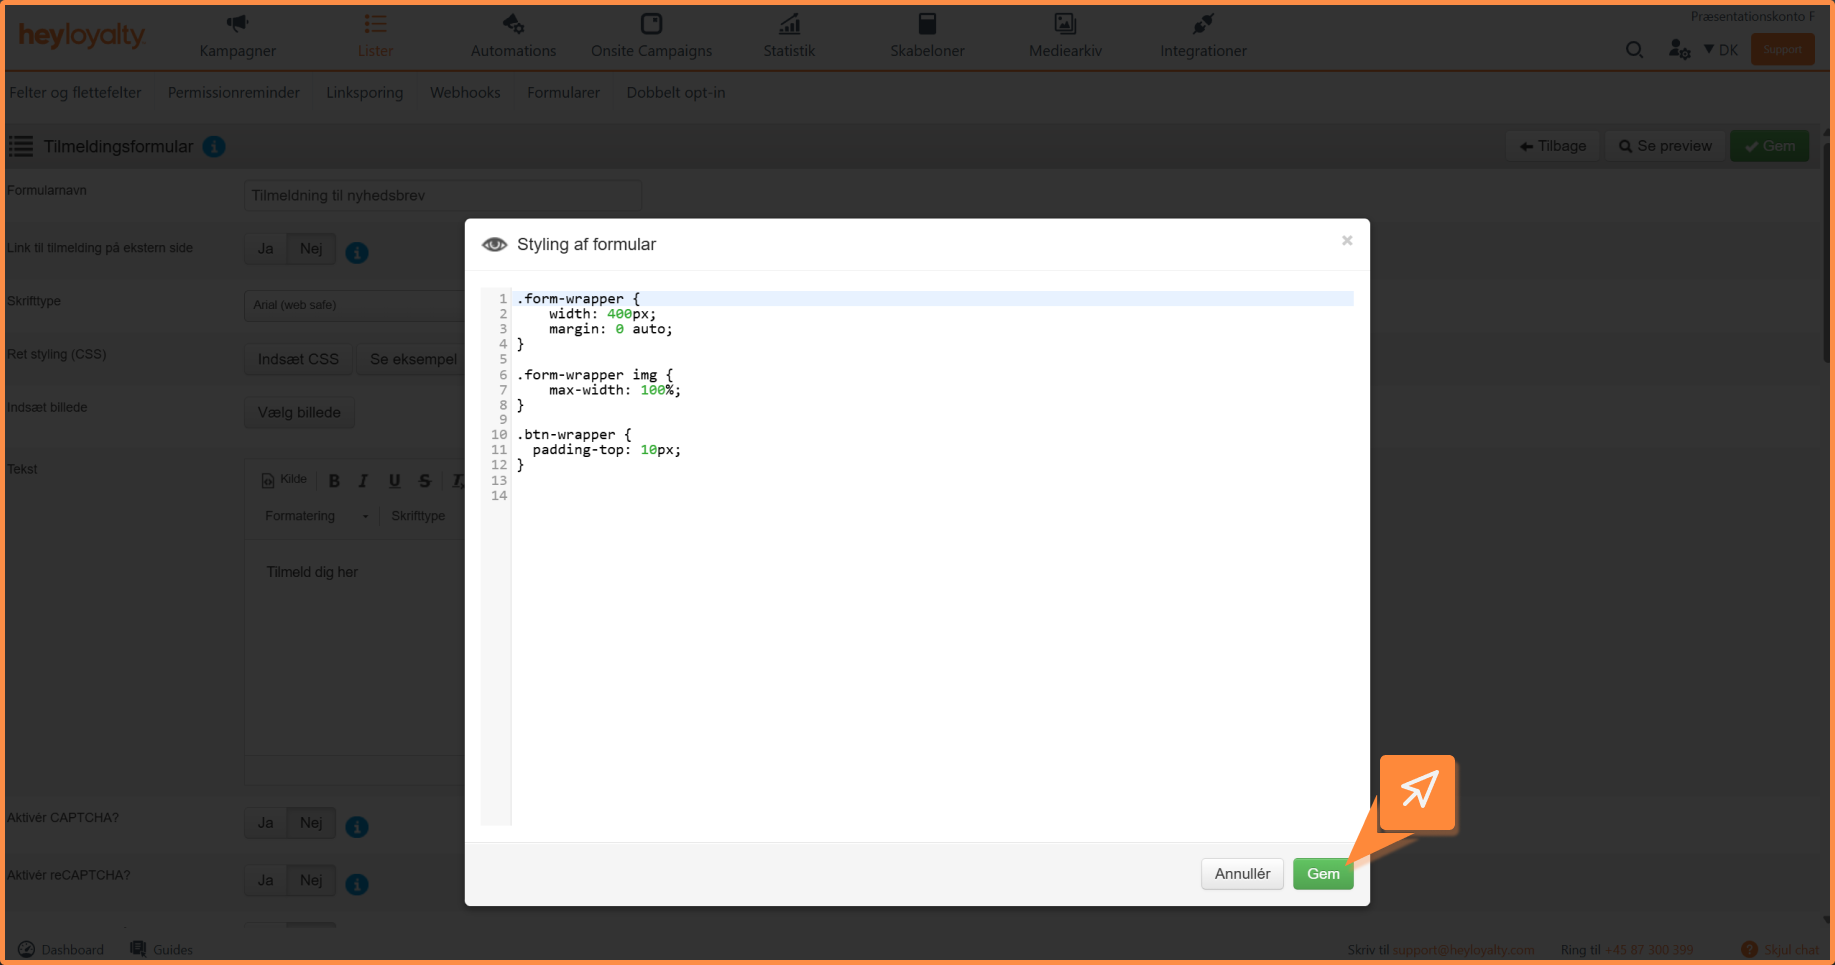
Scroll down and choose which fields should be available in the form.
You can also set the following options:
- Insert image: Add an image (JPEG, PNG or GIF, max. 10 MB). In Image alt text, you can give the image an alt text, which improves web accessibility.
- Text: The text shown at the top of the form. You can customize it as you like within the options of our text editor.
- Activate reCAPTCHA?: Set to Yes to prevent sign-ups from bots. Read more about the setup here.
- Link to terms and conditions on external page: The terms are required, because contacts need to know what they are signing up for. Here you can also change the text of the terms.
- Button text, Button color, Button hover color, Button size and Button placement: Choose the text and colors of the form’s button and adjust its layout.
- Message to already subscribed contacts and Message if the email address has previously failed delivery: Enter the texts contacts see when they cannot be signed up.
- Link to success page on an external page: Here you can send contacts who have, for example, signed up to another web address with a thank-you message or similar. Otherwise, you can use our success page and write what it should say in Text on the success page.
Choose fields for the form
At the bottom of the page where you create the form, you choose which fields your form should contain. Read below how to choose the right fields.
In the highlighted column on the left with the burger menu (marked with four horizontal lines), you can click, hold and drag a field to change the order of the fields.
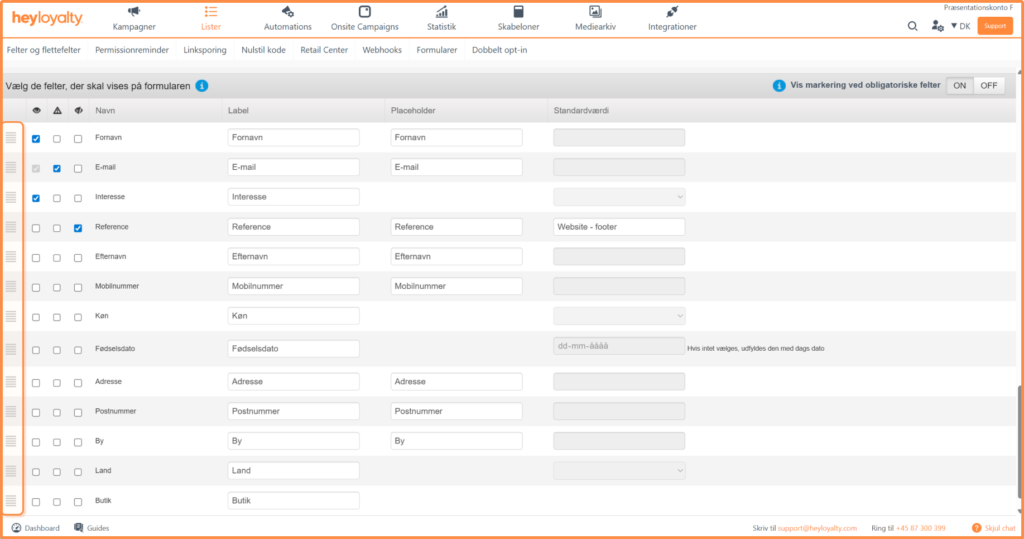
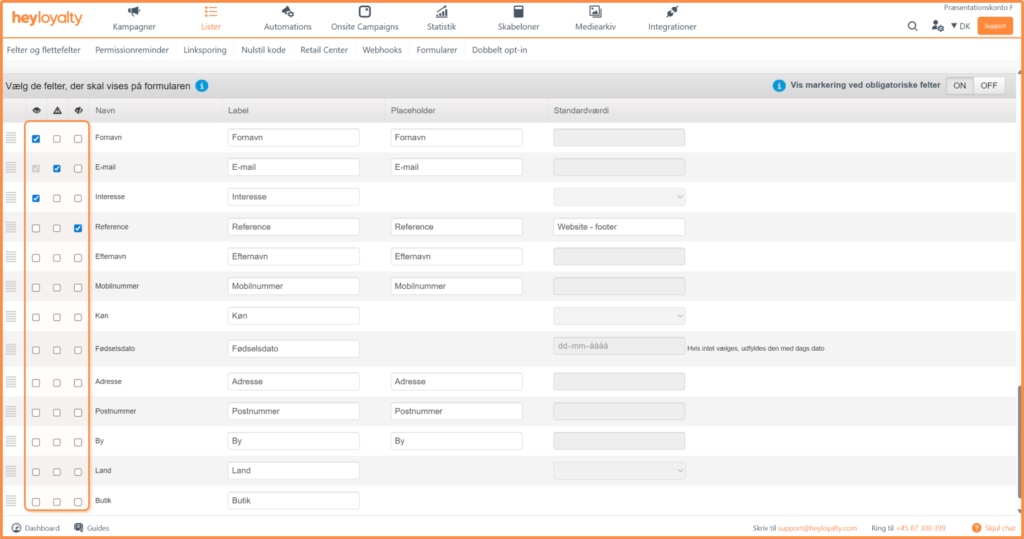
The three highlighted icons define whether a field is Visible, Required or a Hidden field with value.
If the field is Visible, the user can see the field and type in it.
If the field is Required, the user must type something or choose an option before they can submit the form.
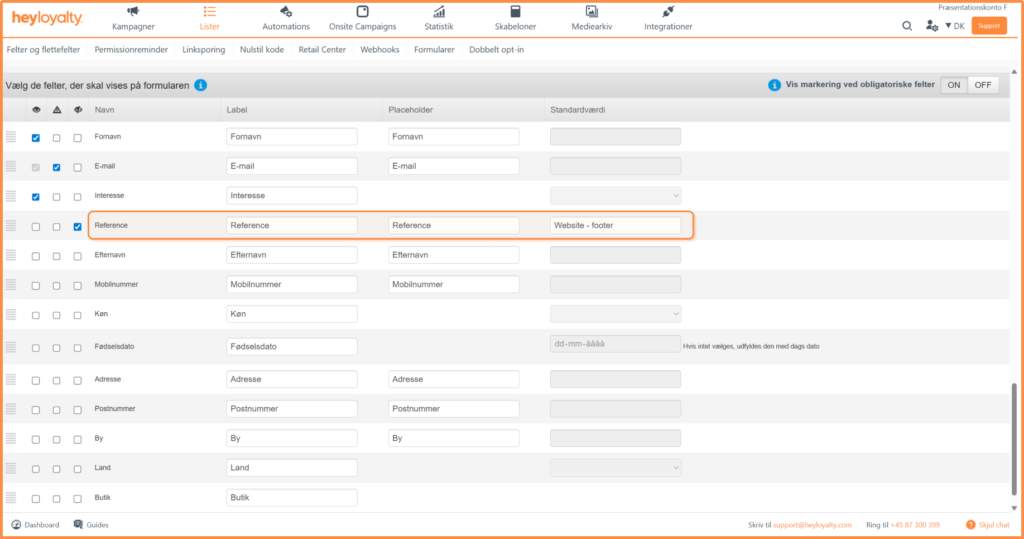
If the field is a Hidden field with value, you can add data to the form that the user cannot see but that you need. You can use this for segmentation, for example by using the Reference field to record where the contact signed up.
If you are creating a subscription form and you know it will be placed in the footer of your website, it can be a good idea to add Reference as a Hidden field with value. Here you can send Website – footer along. All users who sign up via this form will then have the reference Website – footer, which you can use for segmentation in your mailings. It also lets you report on how many sign-ups you get from each channel.
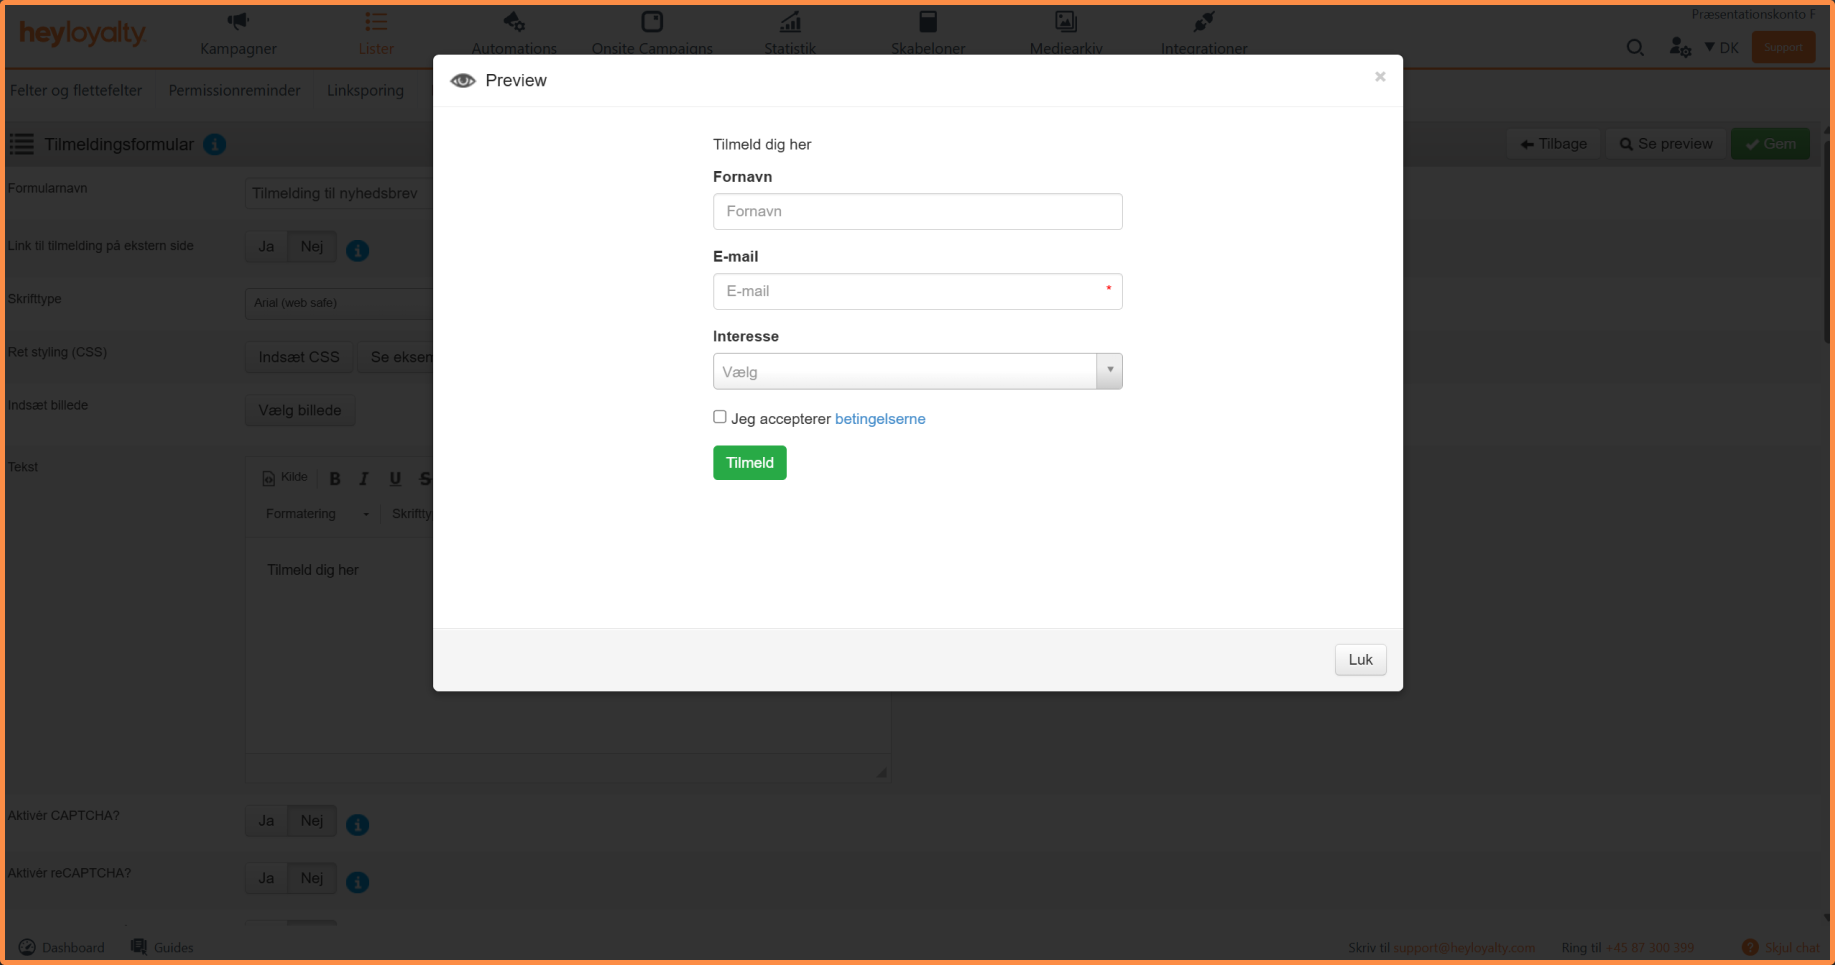
When you have filled in the information and decided which fields to show in the form, click See preview at the top to see a preview of your form. Click Close and then Save if you are happy with your form.
Embed the form
On the overview page of your forms of that type on this list, you can also find the Embed code, so you can add the form to your website.
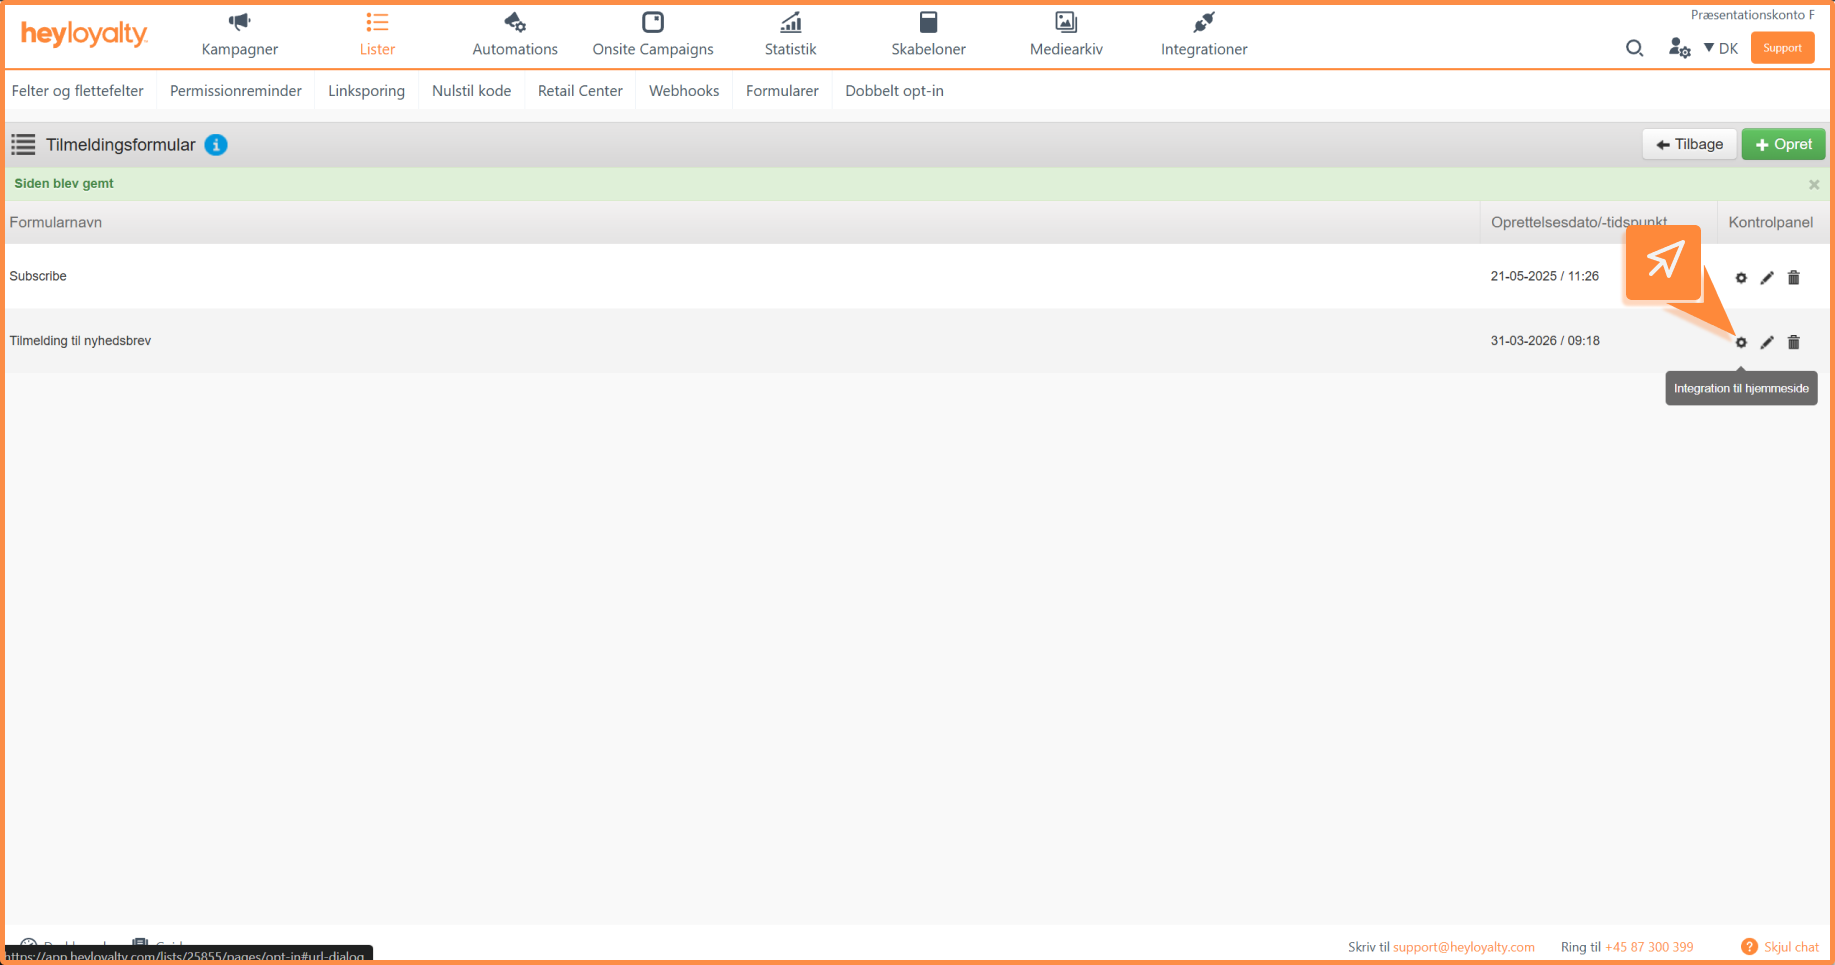
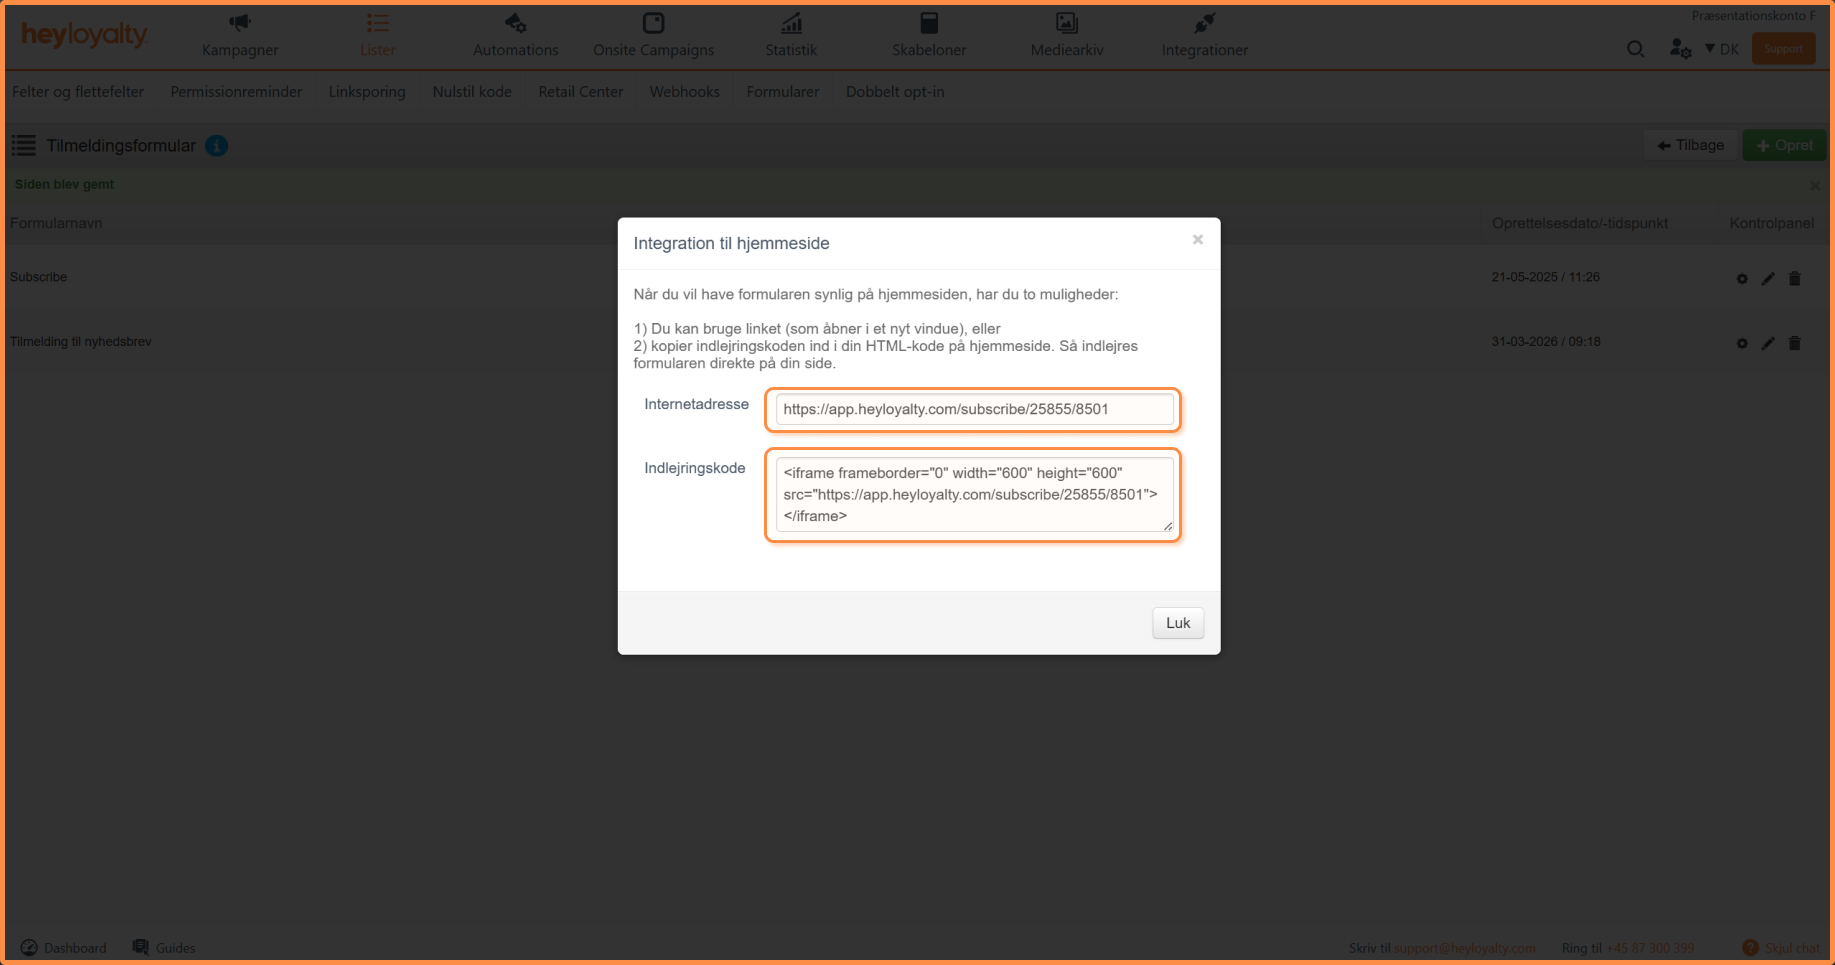
Click the gear icon and choose whether to copy a link to the form (Internet address) or the Embed code, which is a standard iframe. You can paste the Embed code into an HTML element on your website to embed the form directly on your page.
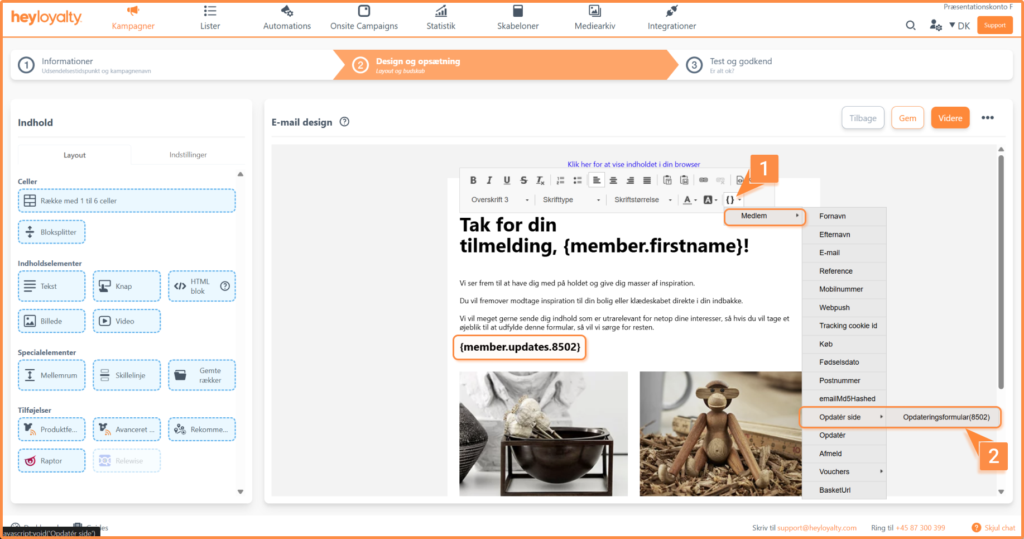
If you want to link to your form in an email, use a merge field, which is turned into a link in the mailing.
A merge field for an update form looks like this: {member.updates.XXXX}, where XXXX is replaced by four digits that are the ID of the specific form.
Update form on your website
If you want your update form on your website, Heyloyalty needs to know which contact to update. This requires some extra setup. Read what needs to be set up here.

If you need information or help that you cannot find here on the guide site, you are always welcome to contact our support!
support@heyloyalty.com