
Setting up the integration with Meta
When you are sure that the above is in place, this employee can log in to Heyloyalty and set up the integration as follows:
Set up Meta – lead ads and audiences in Heyloyalty by clicking Integrations → List integrations → Meta – lead ads and audiences → Setup integration → Activate Meta.
Facebook will now open a new window.
Here, click Edit Access and make sure your company’s page is selected. There must be a check mark next to the Facebook page and ad account in question. Then click Continue as *your name*.
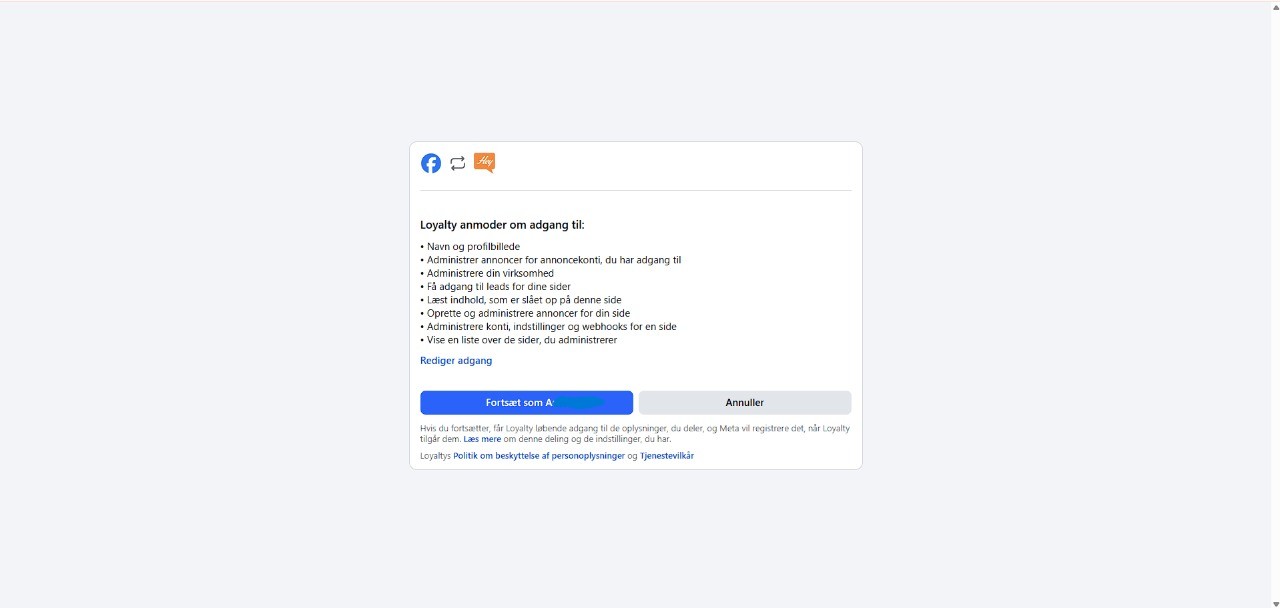
In Heyloyalty, you can now click Create Meta integration. After you clicked Continue as *your name* in the previous step, you should have been taken back to Heyloyalty. Alternatively, you can find your way back by opening Heyloyalty and clicking Integrations → List integrations → Meta – lead ads and audiences → Edit integration → Create Meta integration.
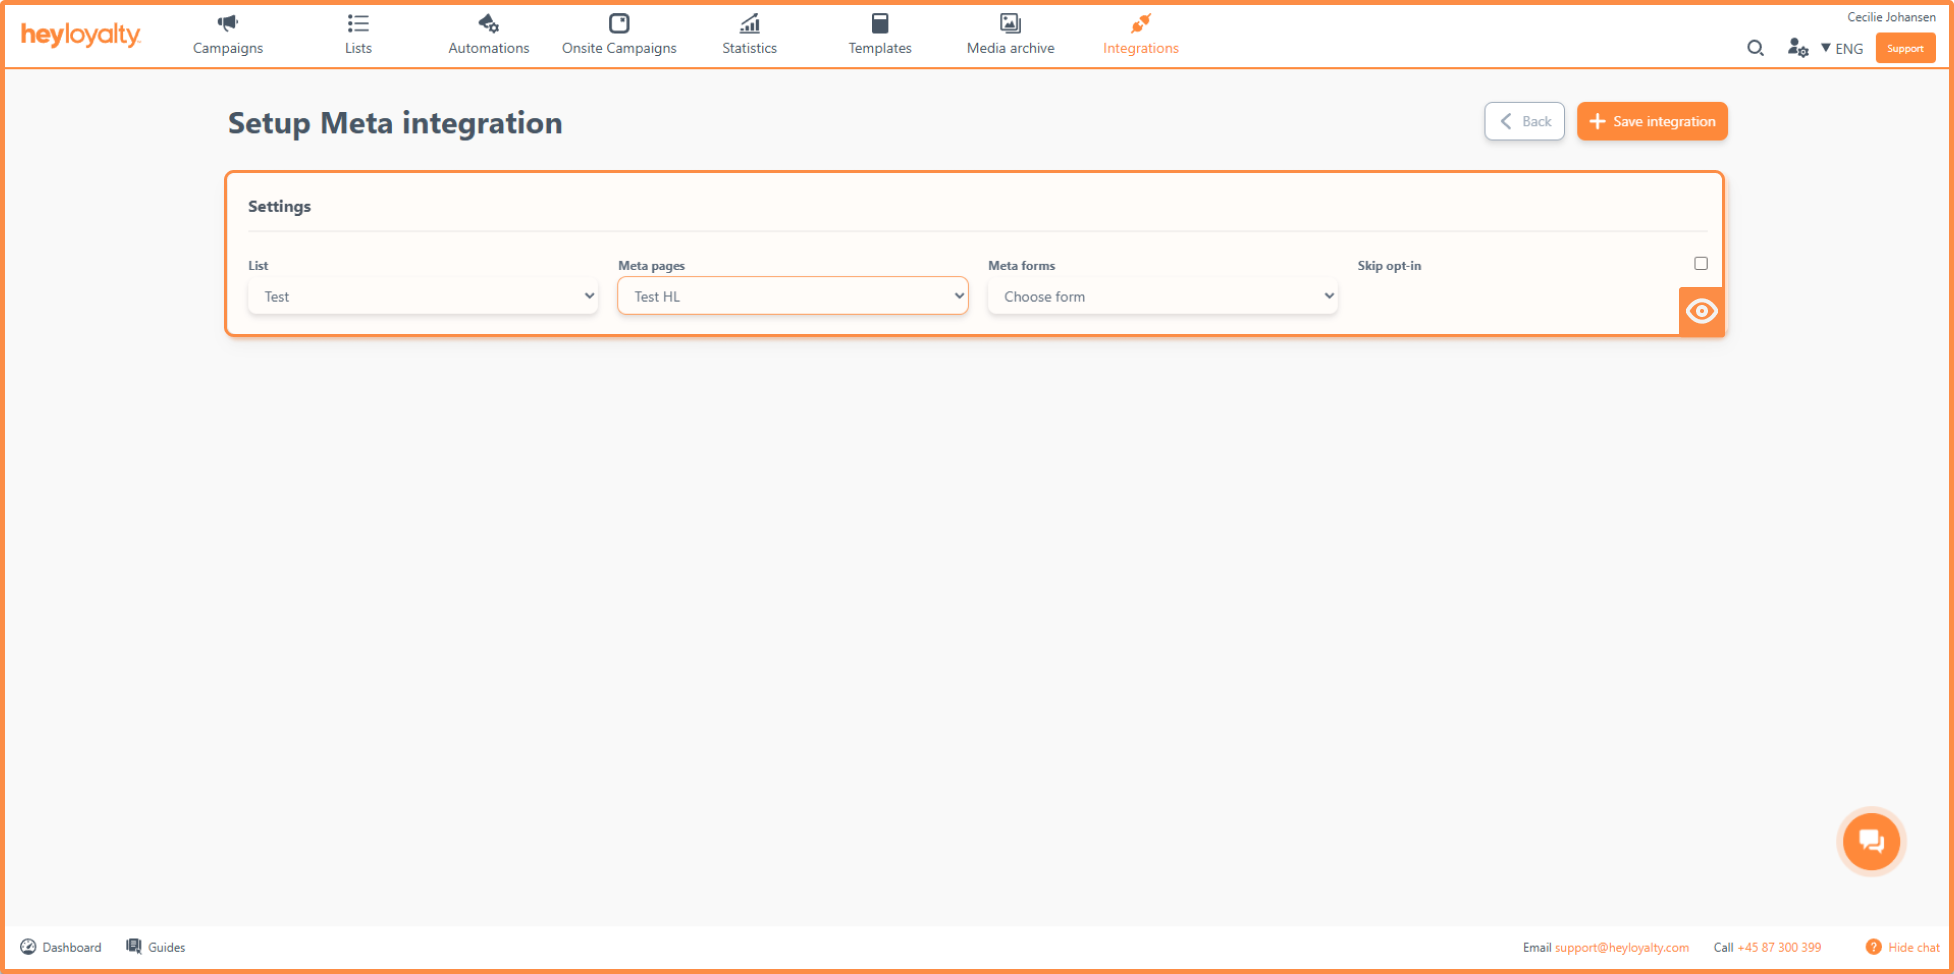
In the List field, select which of your lists in Heyloyalty the integration should be linked to. In Meta pages, select the Facebook page (and the associated ad account) you want to use. In the Instant form field, select the form that you use for your lead ad.
New fields will now appear under Map fields.
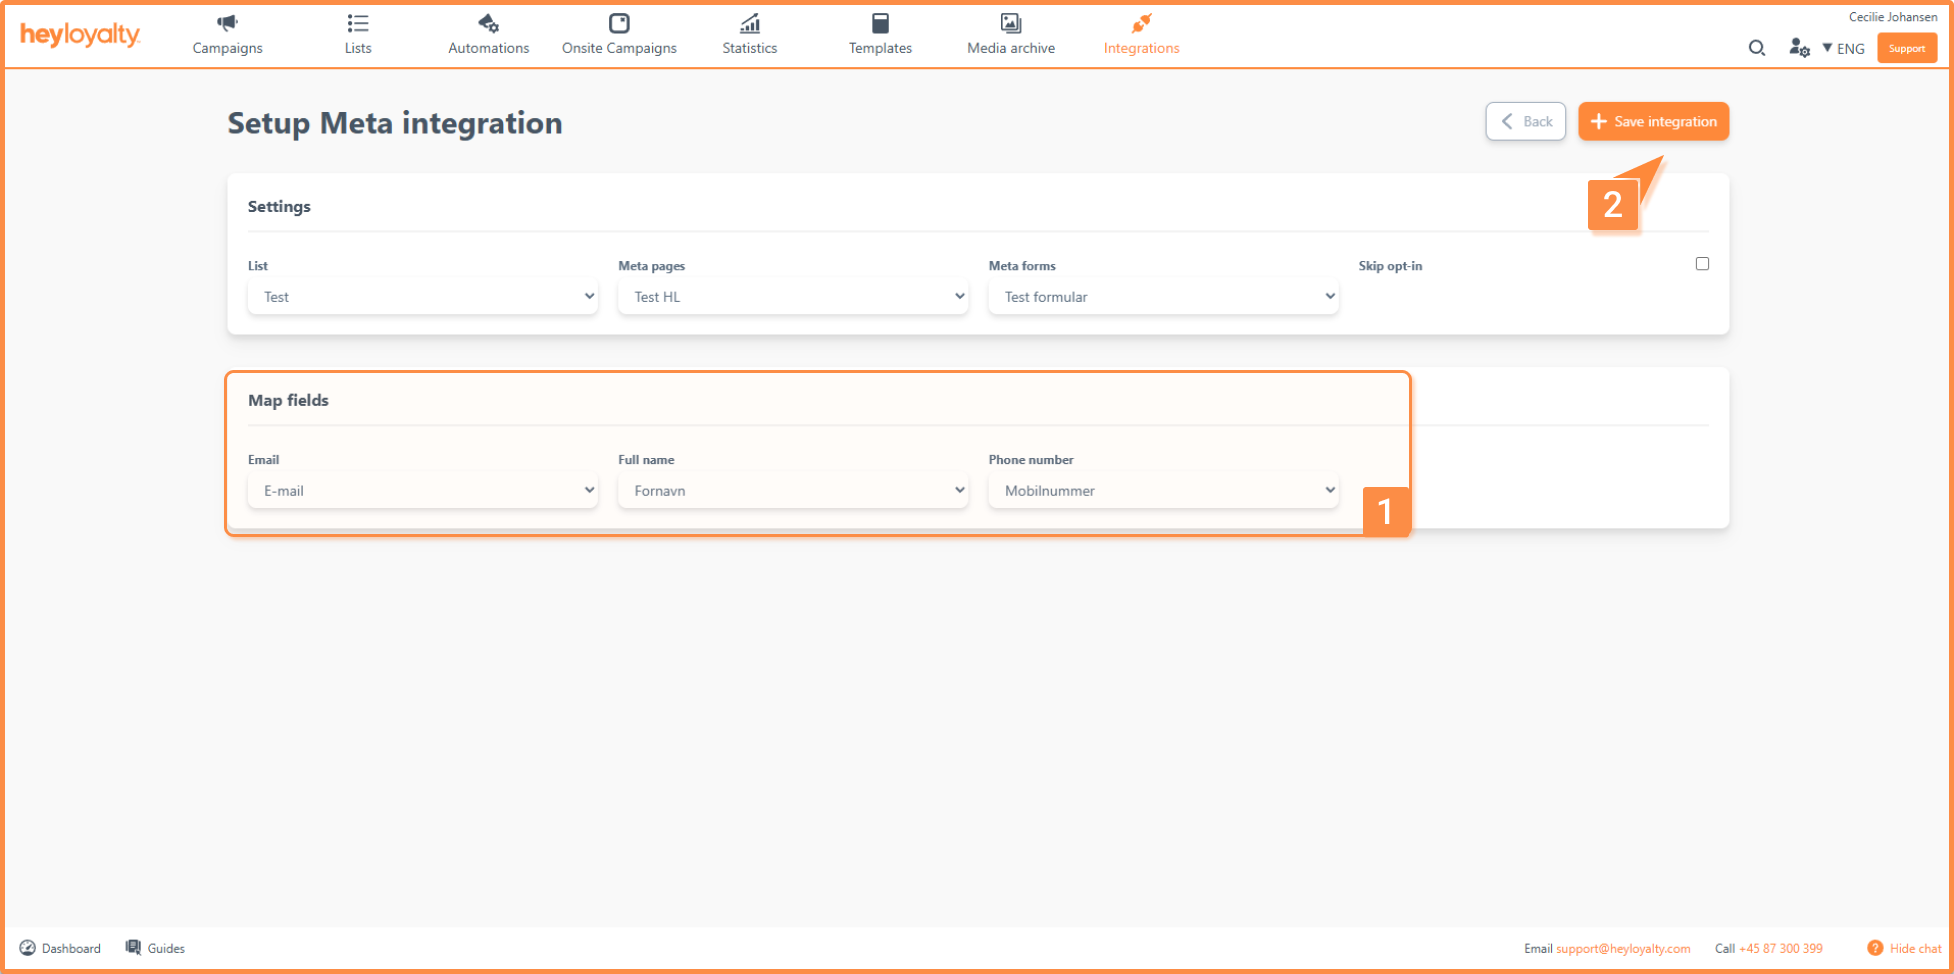
The fields you can see here are the fields used in the selected form from Meta. The field names you see are the names from Meta. In the dropdown menu, you decide which fields in Heyloyalty they should be mapped to. When you have finished the mapping, click Save integration.
Repeat this process for each additional form that you actively use in your lead ads on Meta.
Import previous leads from Meta
If you collected leads through your Meta form before the integration was set up in Heyloyalty, you can bring them in through the Meta integration.
Go to Integrations → List integrations. Find Meta – lead ads and audiences, and click Edit integration.
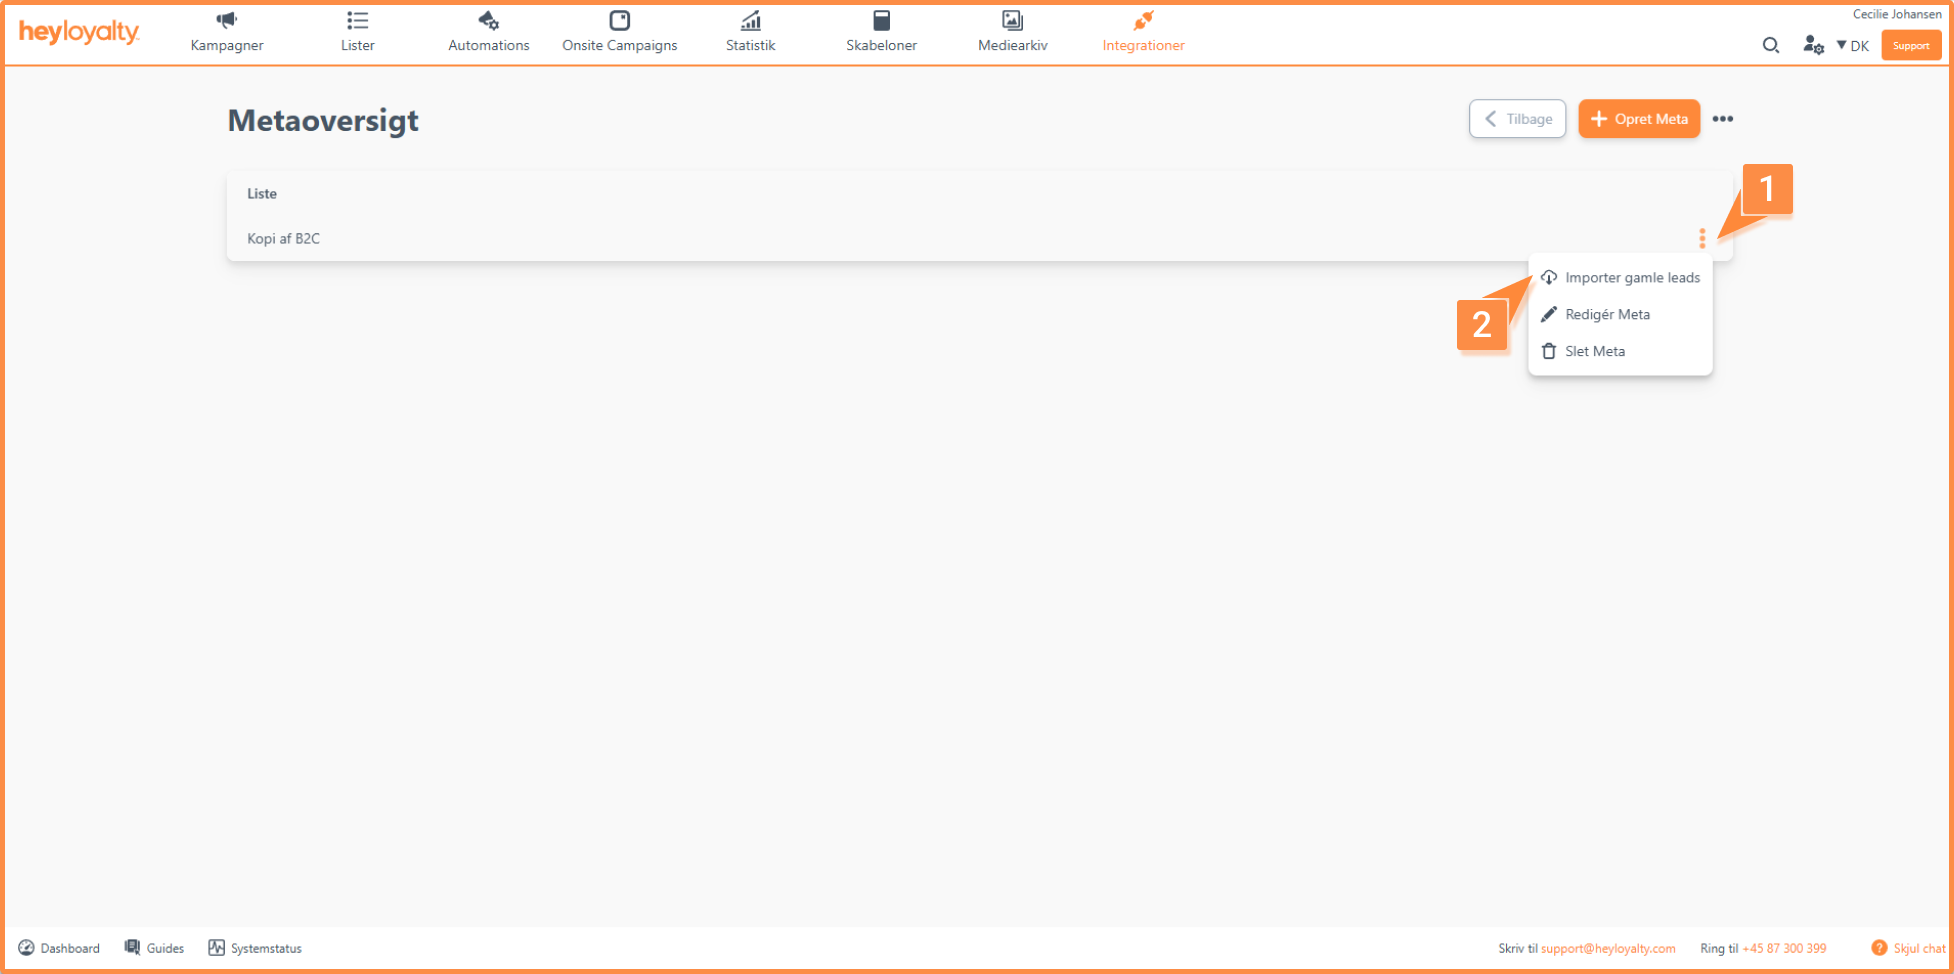
Then click the three dots next to the integration, and select Import old leads.
If you do not want to send sign-up flows, welcome emails or other automations to previous leads, export your leads from Meta instead and import them into Heyloyalty manually. This way, you decide which actions the import should trigger.
Add or remove members from Meta audiences with flows
You can use a flow in Automations to control whether a member is added to or removed from a Meta audience. For example, you can use it to add new members to a Custom Audience automatically, or to remove members again when they unsubscribe.
Go to Automations, click Create new automation, and then click Create Automation Flow. Select the trigger that determines when the member should be added to or removed from the audience. In many cases, a trigger for a sign-up or an update of the member is relevant. The right trigger depends on your setup and on what you want the flow to do. Once you have selected the trigger, continue to the flow builder.
Click the plus sign in the flow, and select the Facebook element:
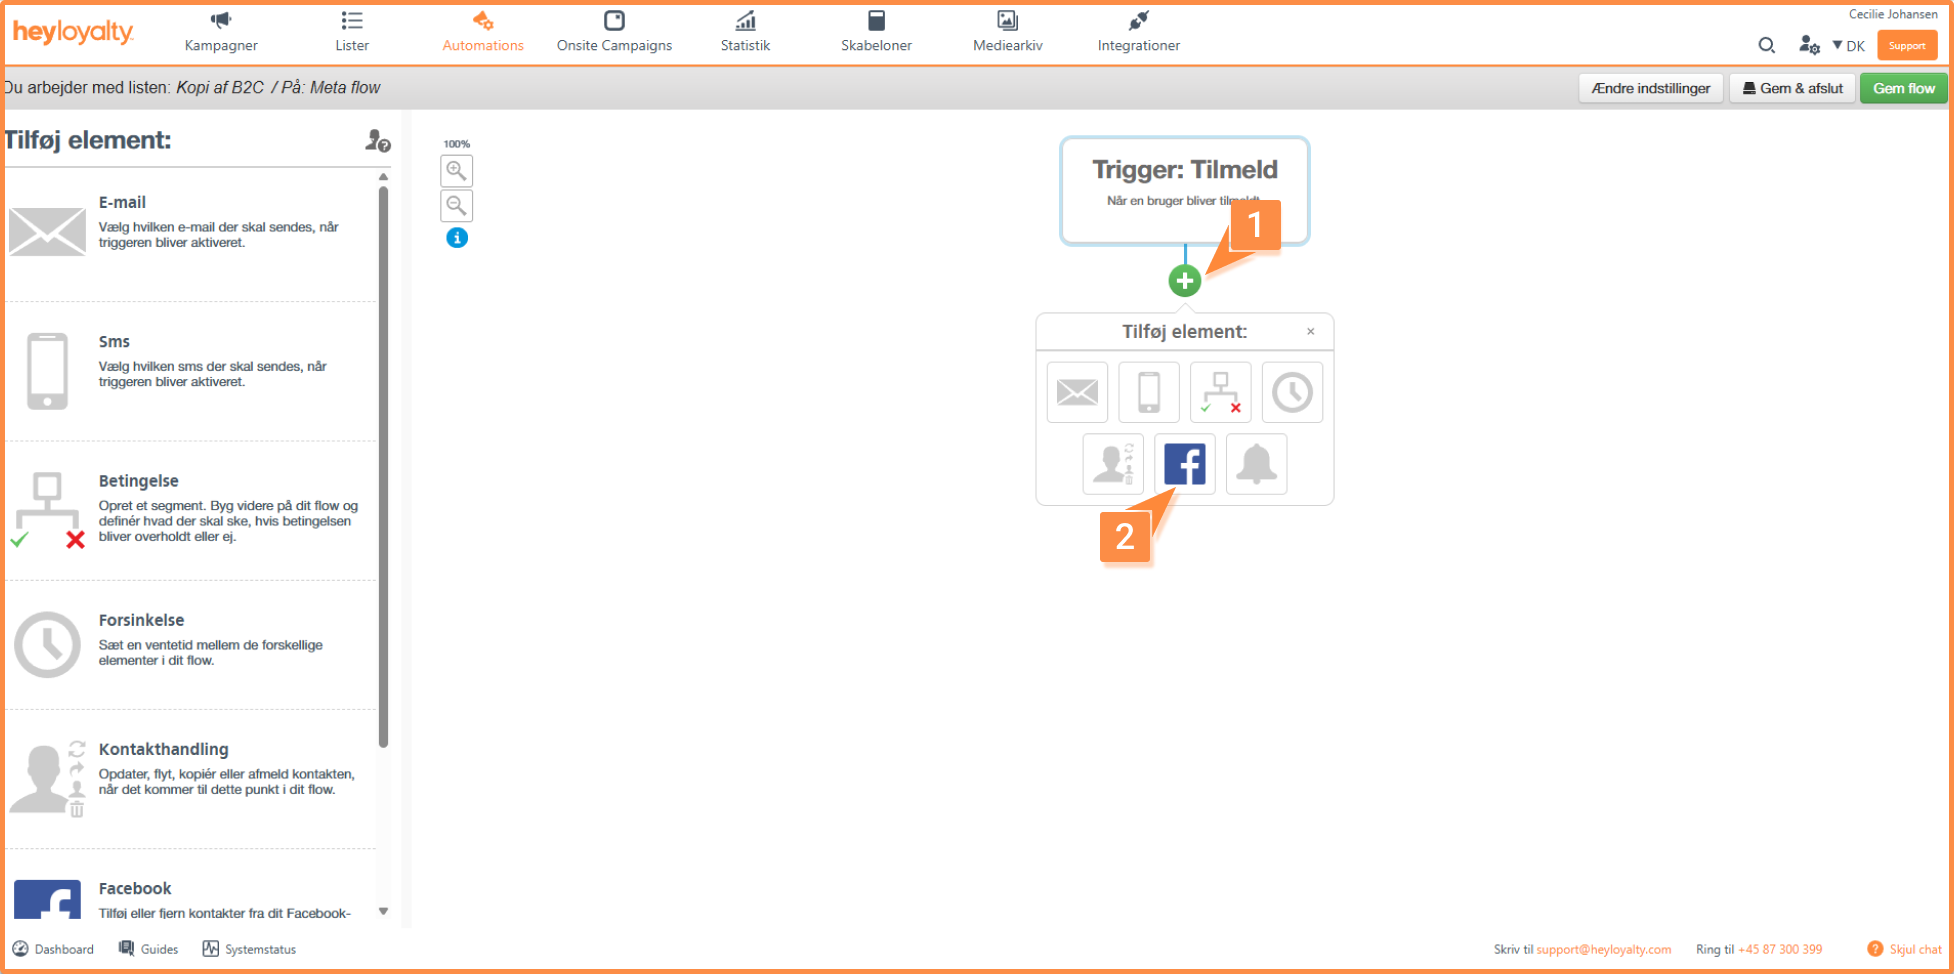
Then fill in the fields for the element:
- Facebook ad account: Select the ad account where your Custom Audience was created.
- Custom audience: Select the Meta audience that the member should be added to or removed from.
- Add or remove contact?: Select Add contact to audience if the member should be added to the audience when they reach this step in the flow. Select Remove contact from audience if the member should be removed from the audience.
Click Save settings when you have filled in the settings.
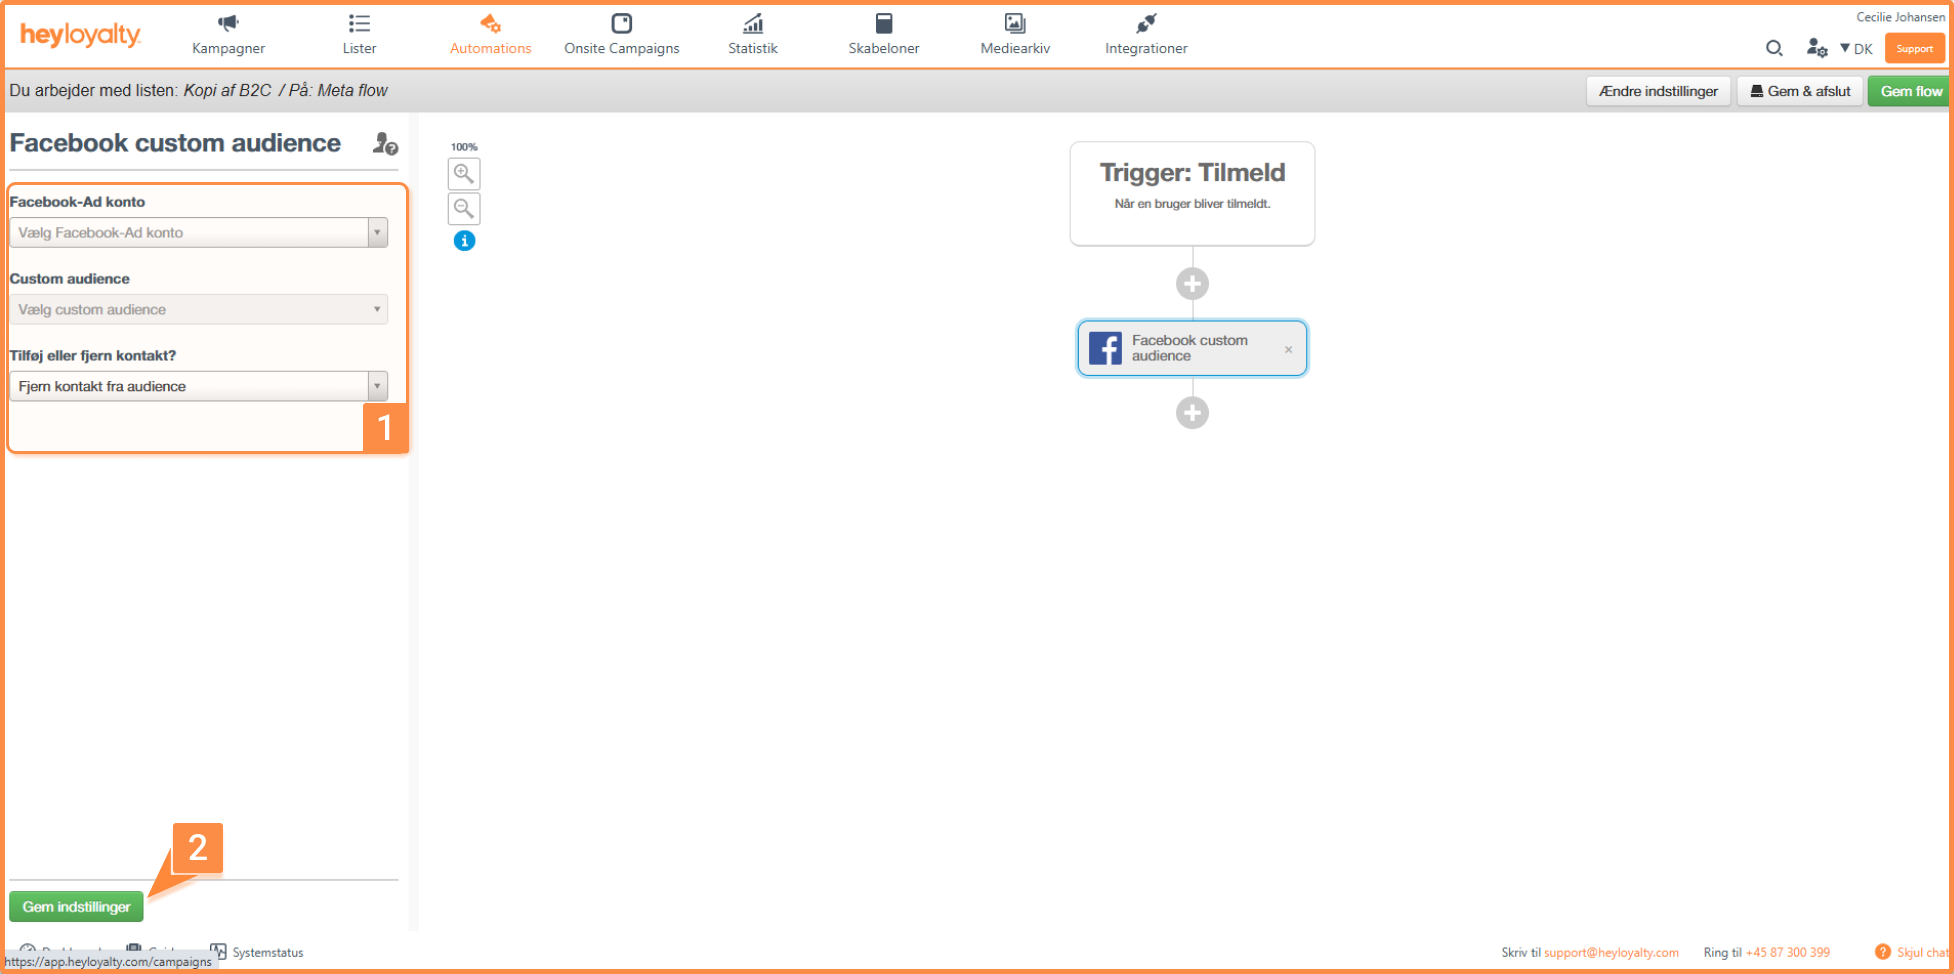
You can then either continue building the flow with more actions or save the flow if the Meta action is the only thing that should happen.
Access to Custom Audiences
Make sure that you have accepted the terms for Custom Audiences, so Heyloyalty can send data to your Custom Audiences.
For Audiences, go to: https://business.facebook.com/ads/manage/customaudiences/tos/?act=<AD_ACCOUNT_ID>
Here, replace <AD_ACCOUNT_ID> with your ad account ID (replace all of <AD_ACCOUNT_ID>, including < and >).
Find your ad account ID by going to business.facebook.com and selecting the business account used by the page you have connected to Heyloyalty (if you have connected several Facebook pages to your Heyloyalty account, repeat this step for each of them).
Once you have selected your business manager, you can see the pages and the “Ad Account” connected to this business manager.
Click the ID, and it is automatically copied to your clipboard. Paste the link into a new browser tab, and replace <AD_ACCOUNT_ID> with your ID.
This means your link should look like this (with different numbers at the end): https://business.facebook.com/ads/manage/customaudiences/tos/?act=123456789123456
This takes you directly to a page where you give Heyloyalty permission to add and remove members in the Custom Audiences that you choose to connect to Heyloyalty.
Segment members who come from Meta
If you want to find the members who were created through the Meta integration, you can create a segment on the list.
Go to the relevant list, and select Segments → Create new segment.
Then create a rule with the following settings:
- Field: Created from
- Operator: Similar to
- Value: Facebook
Click Apply when the segment is set up.
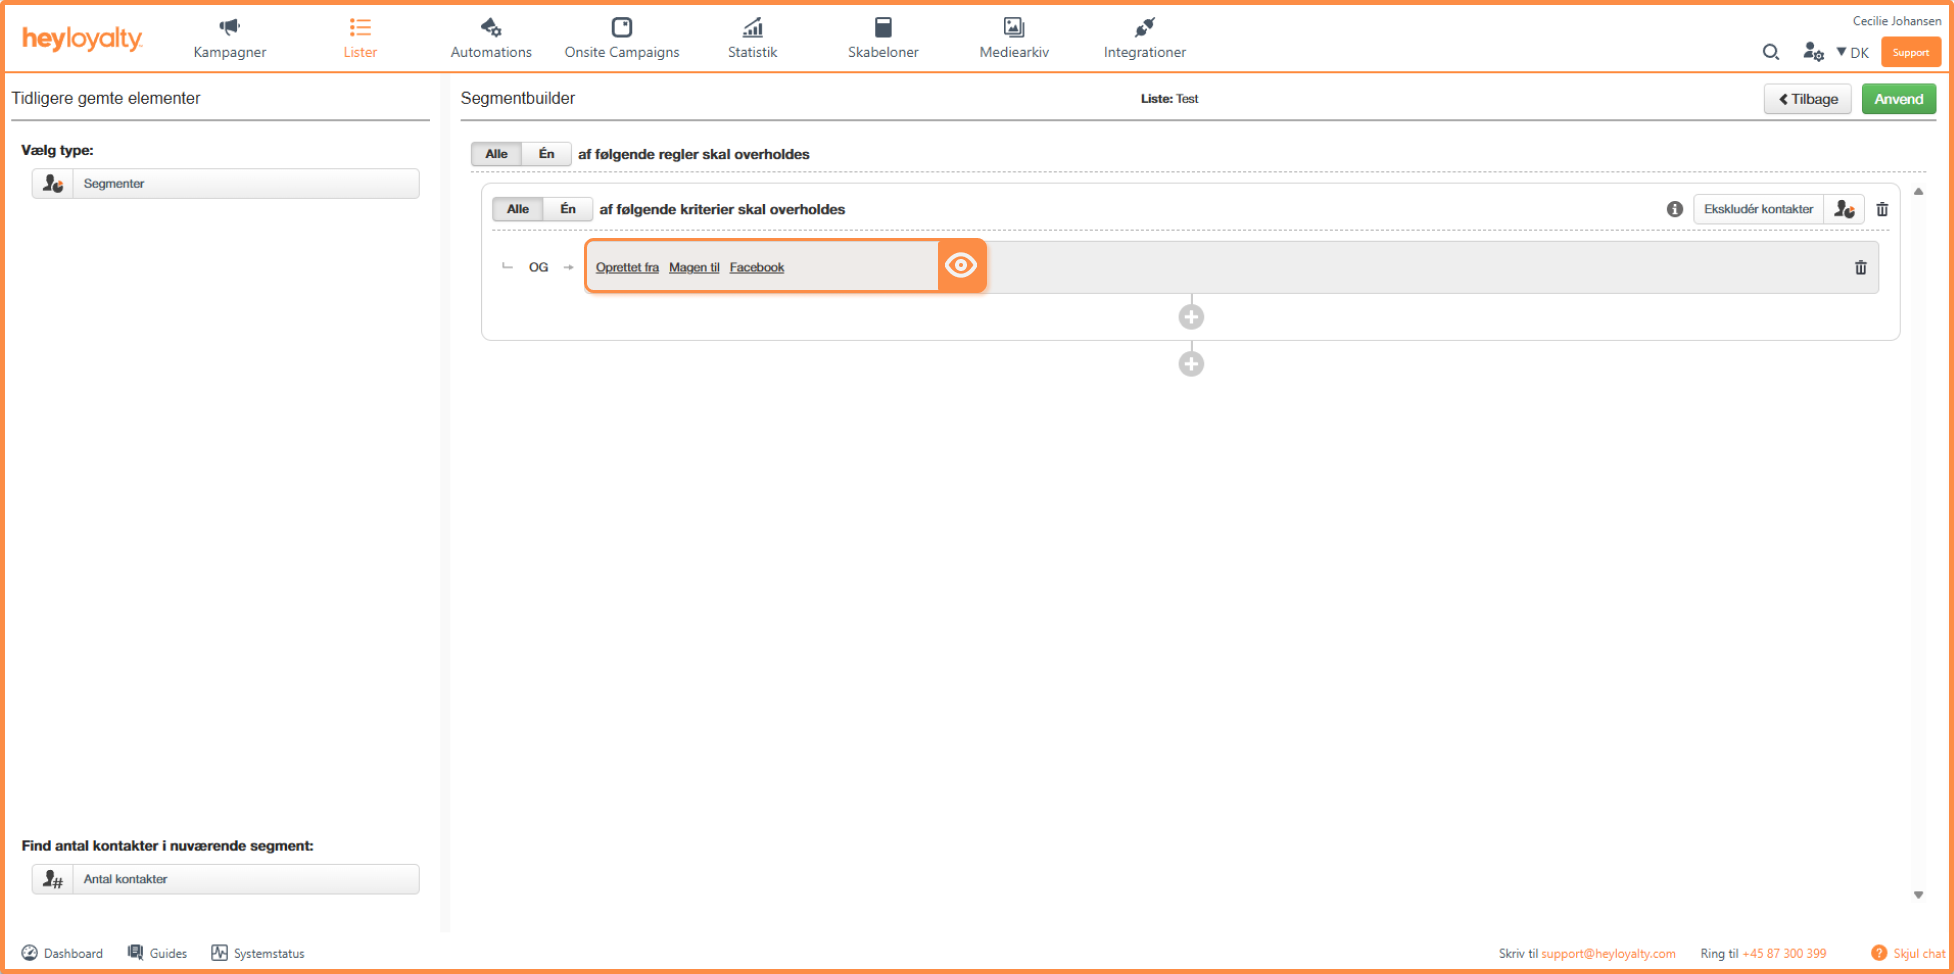
The segment now shows the members on the list who were created through Meta.
Get more value from your Meta leads
Once the integration is set up, you can put your Meta leads to active use in Heyloyalty. You can make sure that new leads land on the right list automatically, use them in your flows and work in a more targeted way with your audiences in Meta. This gives you a better basis for reaching the right people with your ads and for creating a more consistent experience across Meta and Heyloyalty.

If you need information or help that you cannot find here on the guide site, you are always welcome to contact our support!
support@heyloyalty.com