
With the Rules feature, you can target the different rows in a campaign or flow. This means that a row is only shown to a specific segment. This way, you send one newsletter, but each recipient only sees the content that is relevant to them.
This guide shows you how to set up rules step by step – and gives a concrete example of how effective it is.
Step 1: Find Row settings
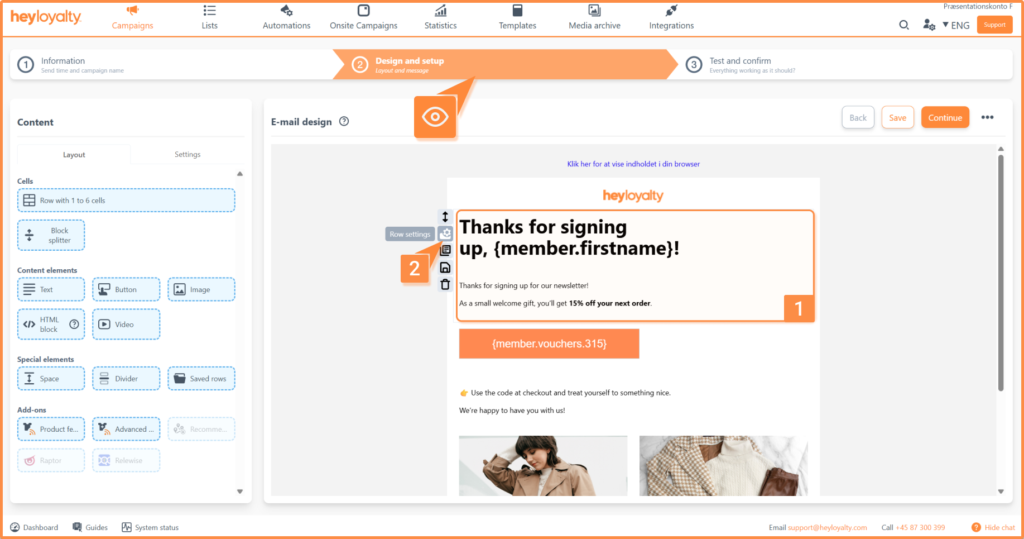
Go to Step 2 – Design and setup in your campaign.
Find the row where you want to insert a rule, and then click the icon with the cog called Row settings.
Step 2: Add or edit a rule
Here, find the Rule handling option and select Add new rule.
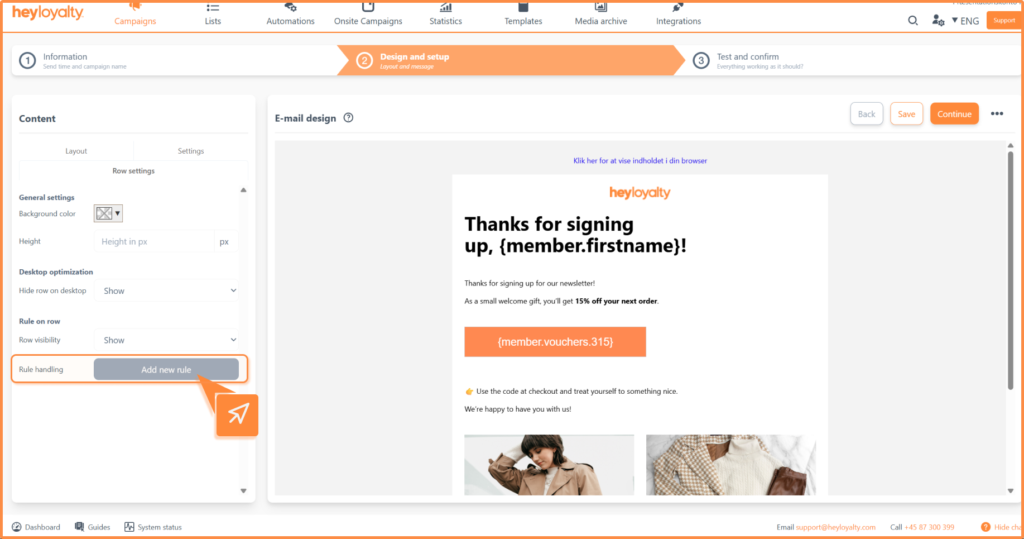
This opens the segment builder. You can read how to use it here.
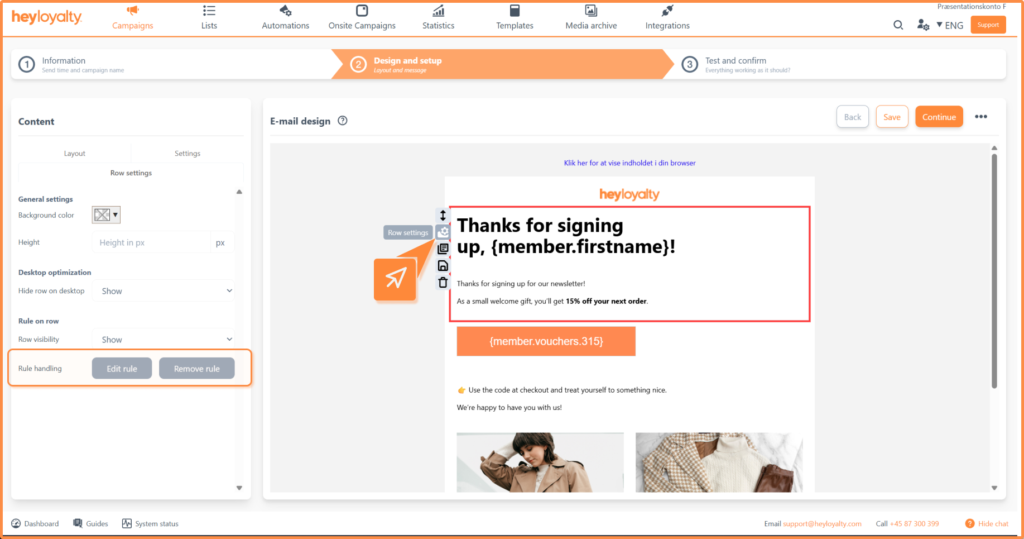
If there is already a rule in the row, you can edit, delete or add a new one here when you access the row settings:
Apply segments from your list
If you want to use segments that you have already created in your list, you can add them under Rules on rows in Step 2 – Design and setup. To use segments in your rules, you first need to enable the Advanced content segments option under Default settings.
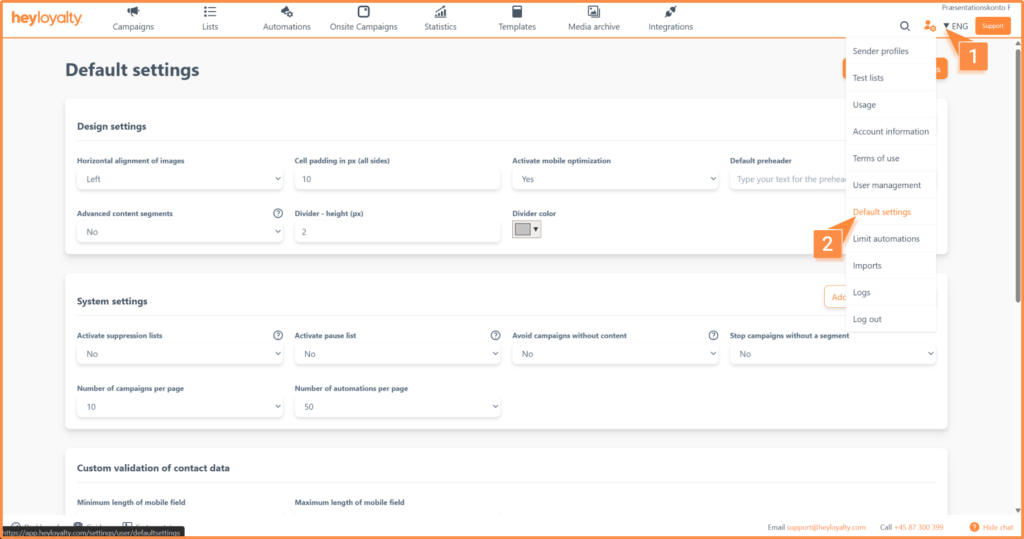
Then set the Advanced content segments option to Yes.
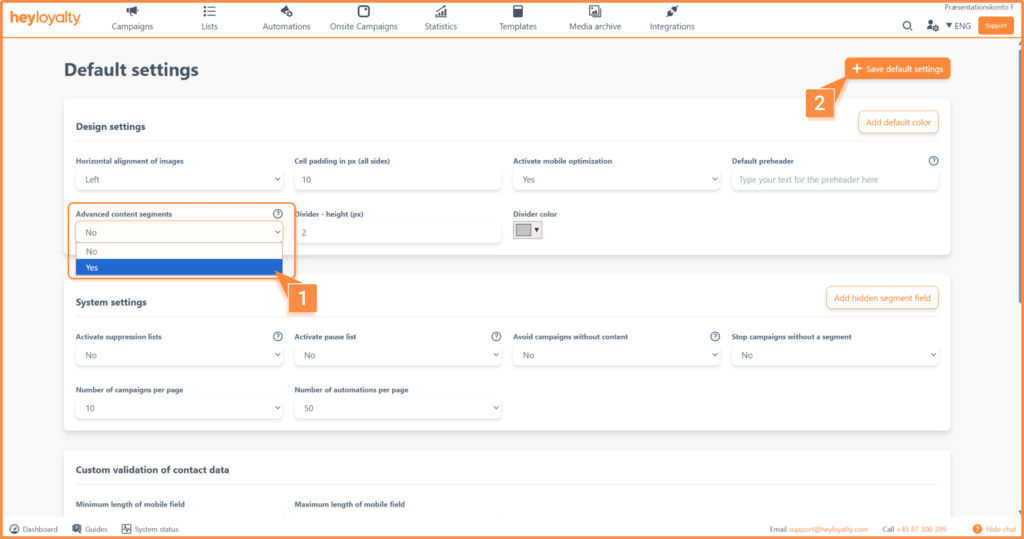
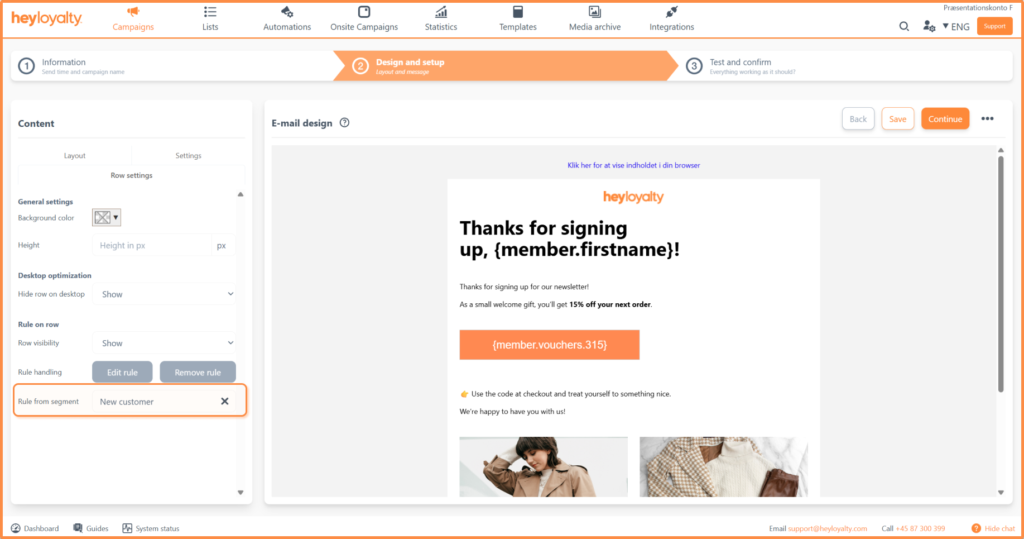
When set to Yes, the Rule from segment option will appear under Row settings in Step 2. Here you can search for the name of the segment you created in the list and select the segment to use for the rule.
Next steps
You’ve now learned how to set up row-level rules and use segmentation to personalize your content. This will streamline your workflow and ensure that your members get exactly the content that is relevant to them, benefiting both you and your customers.
Once you’re happy with your rules, you can move on to customizing the visual appearance of the rows. You can read how to set up your campaign here.
Have fun personalizing your content.